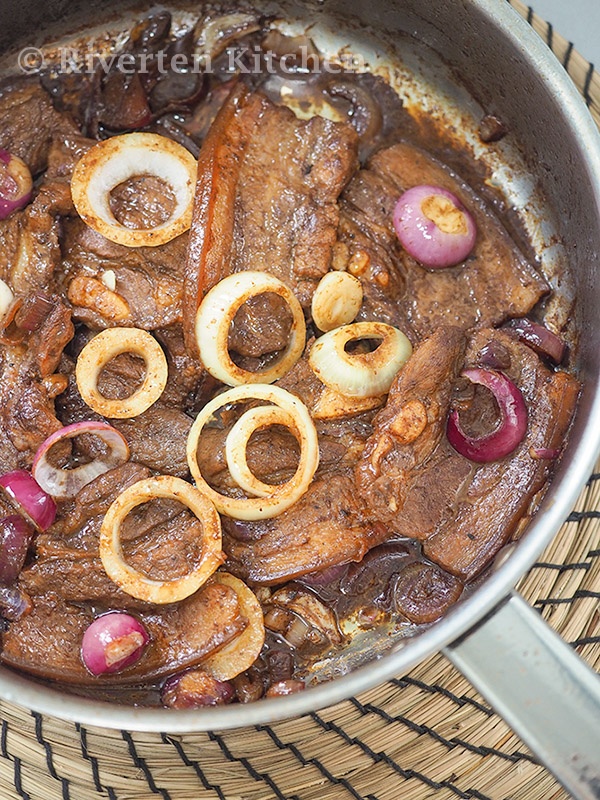
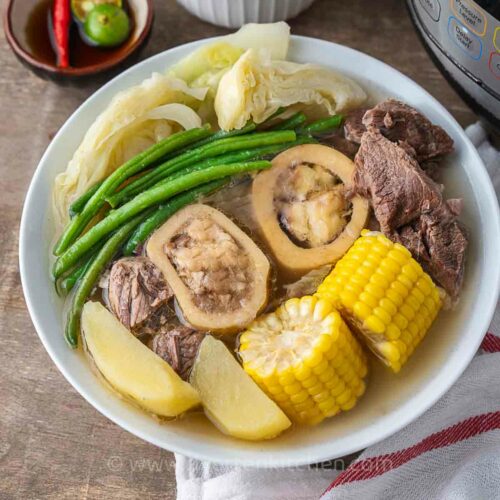
Nilagang baka or bulalo is a heartwarming and flavorful beef soup loaded with tender cuts of beef and fresh vegetables. Simmer gently on the stovetop for a classic approach, or use an Instant Pot for a quicker yet equally flavorful broth.
What is Nilaga?
Nilaga, a Filipino favorite, is a heartwarming clear beef soup brimming with healthy vegetables. Unlike many other Asian beef soups, Nilaga doesn’t shy away from incorporating an abundance of wholesome ingredients.
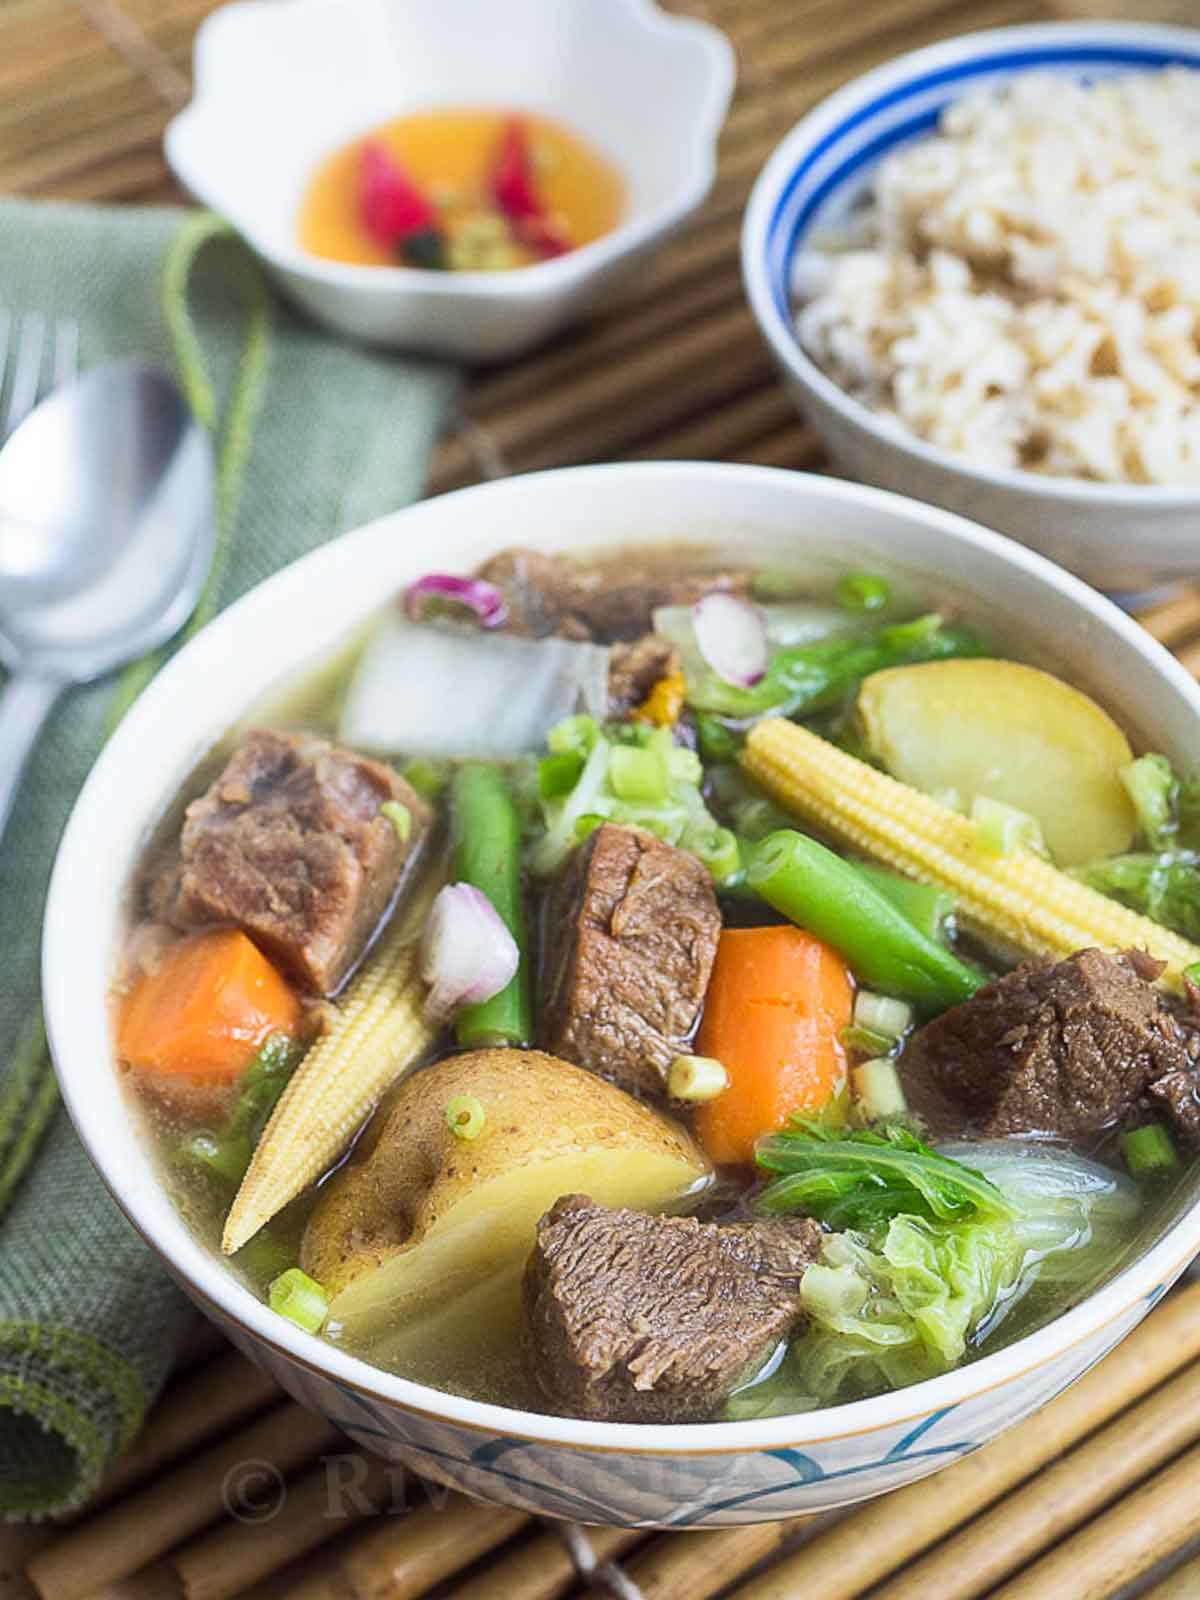
Potatoes, green beans, and cabbage form the base of this comforting dish, while corn and carrots are sometimes included to add a touch of natural sweetness.
Nilagang Baka vs Bulalo
Nilagang baka and bulalo are both Filipino beef soup dishes. They share similar ingredients and cooking methods. However, the key difference lies in the cut of beef used.
Nilagang Baka features boneless beef chunks, resulting in a lighter and clearer broth simmered with various vegetables. Bulalo, on the other hand, utilizes the heartier beef shank, complete with the bone. This bone marrow contributes significantly to the richness and depth of flavor in the final product.
Best Beef Cut
For beef nilaga, consider cuts with a good balance of meat and fat, often sold for stews, as these excel in long cooking. Collagen-rich options are particularly recommended for their ability to enrich the broth with flavor and body. Excellent choices include beef tendon, brisket, short ribs, and chuck roast.
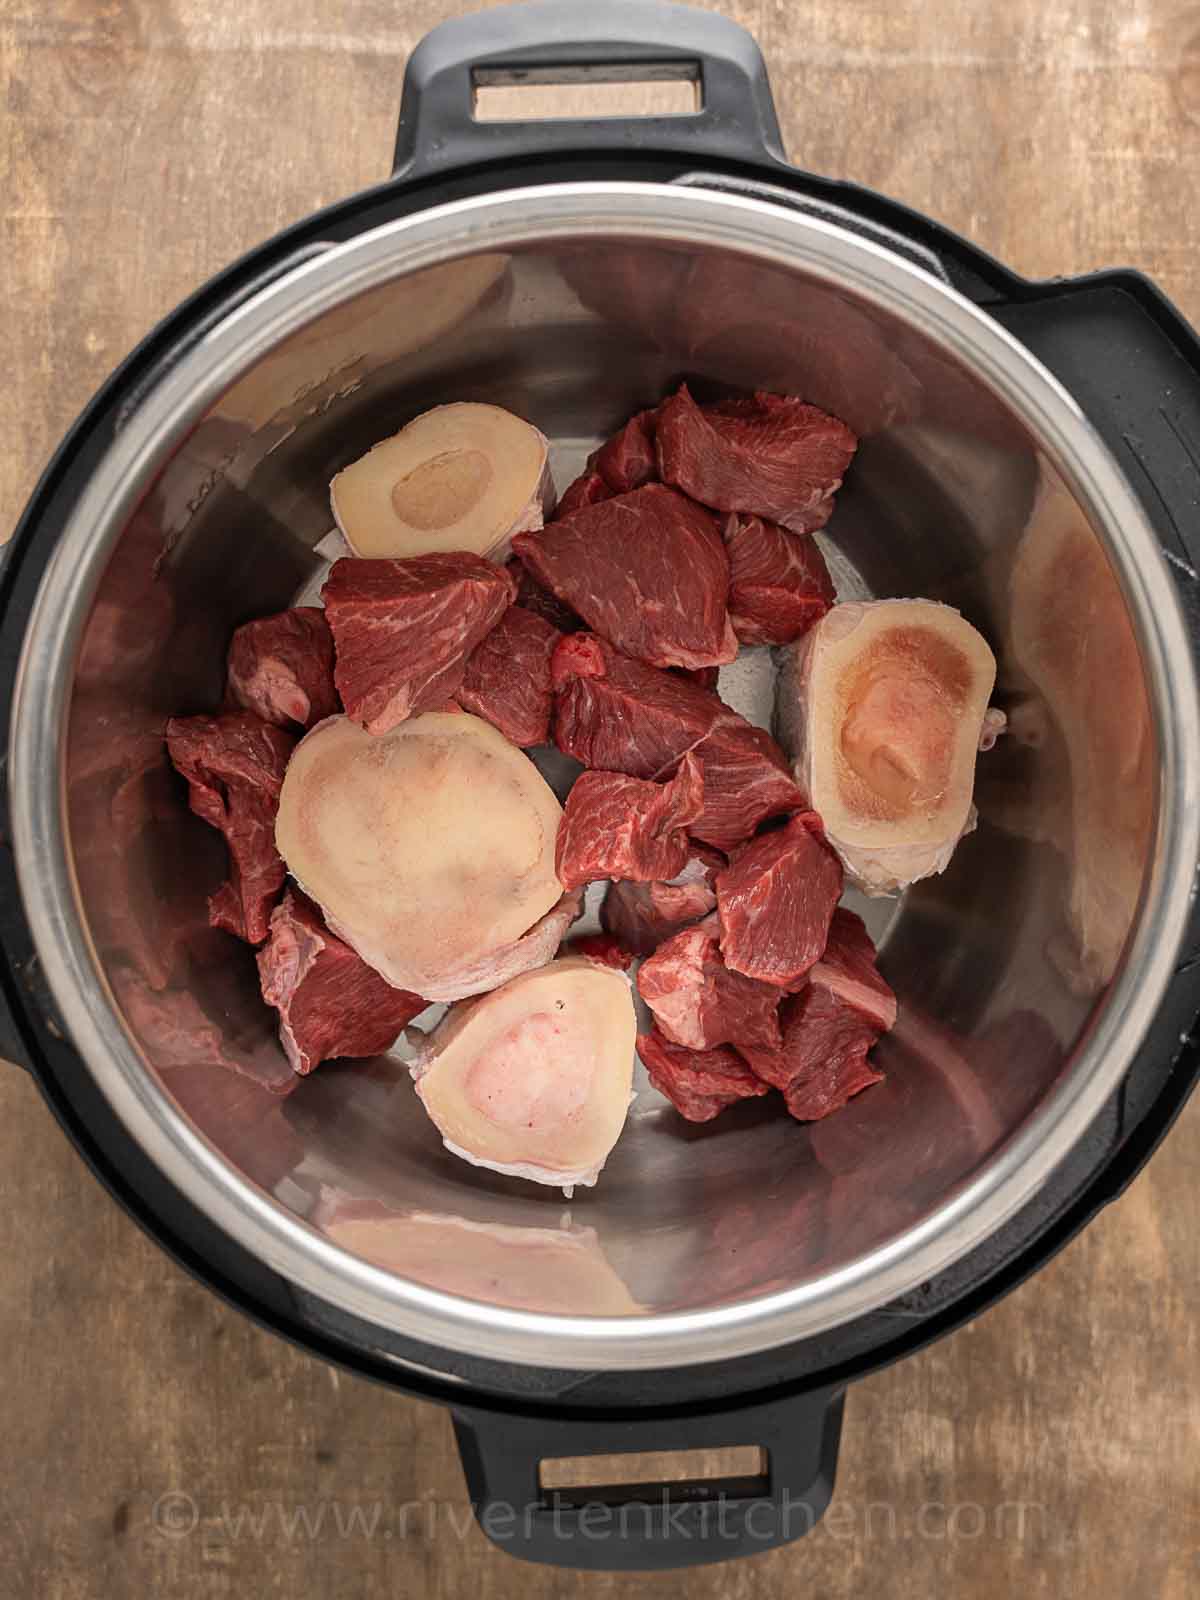
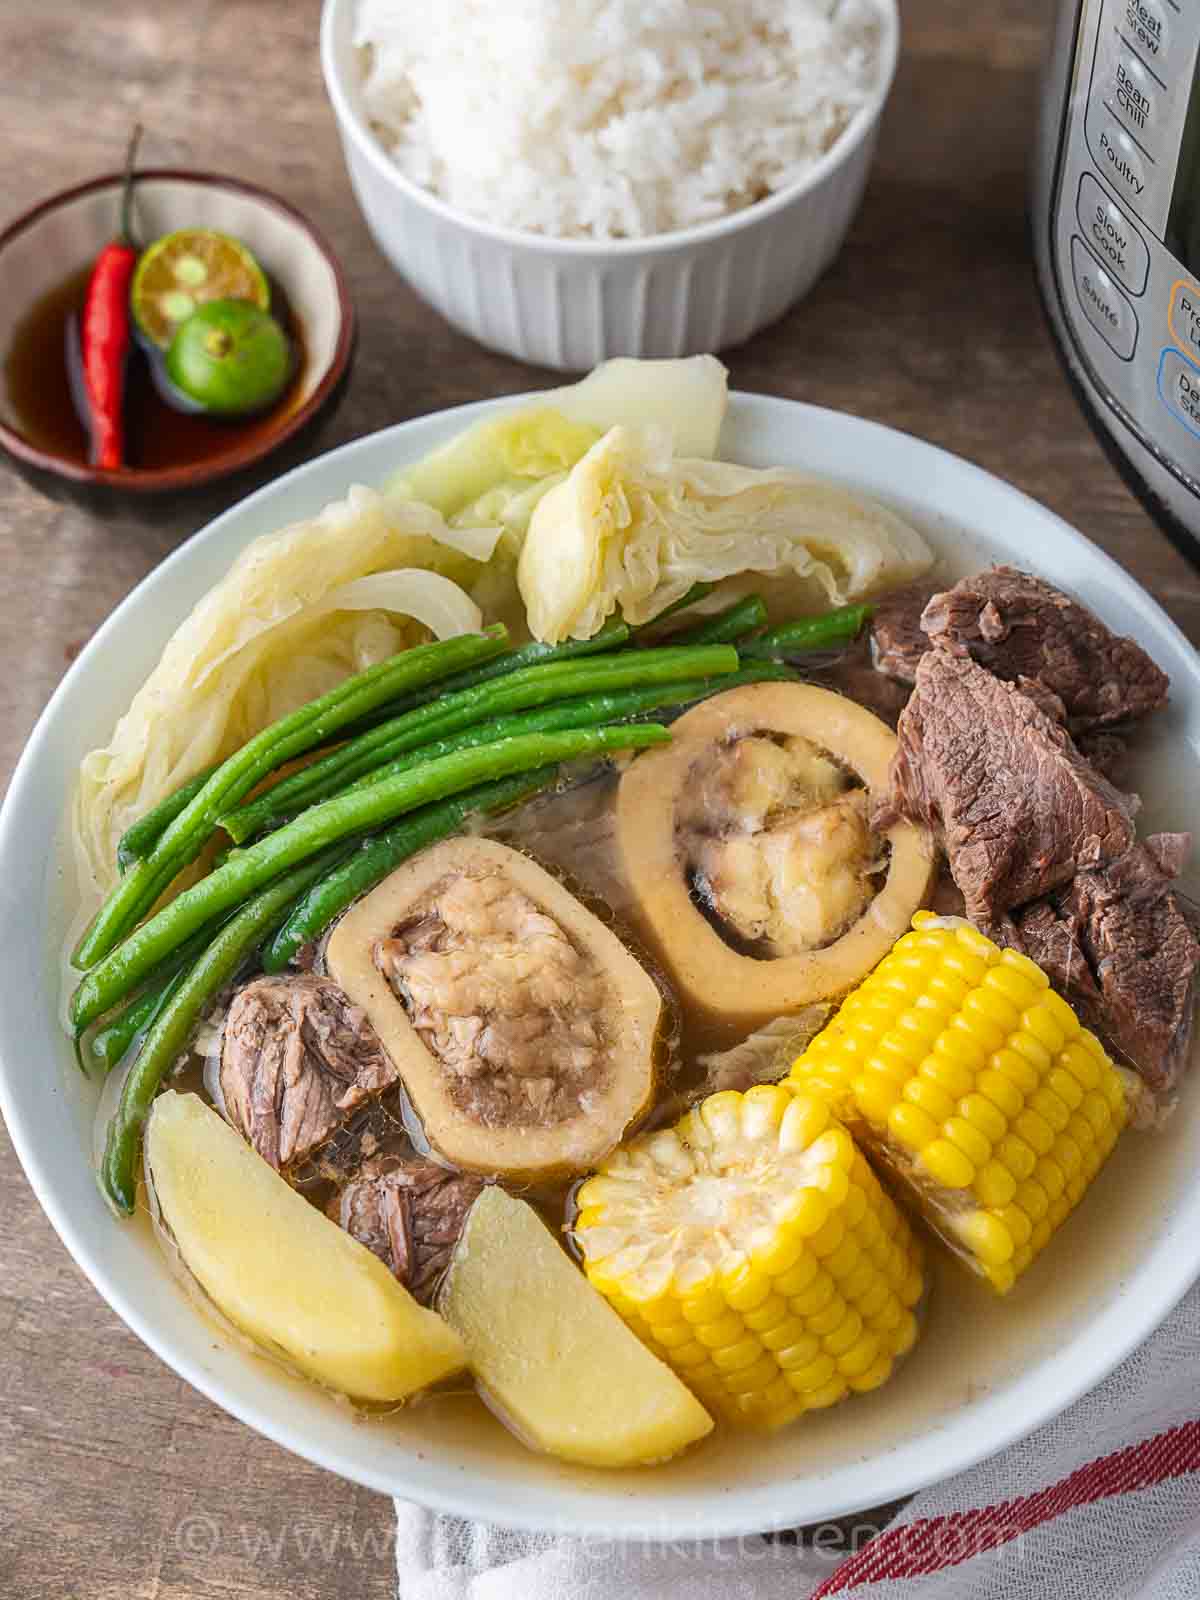
For bulalo, beef shanks are the recommended cut. In this recipe, I used a combination of beef bones with bone marrow and boneless beef chunks. So good!
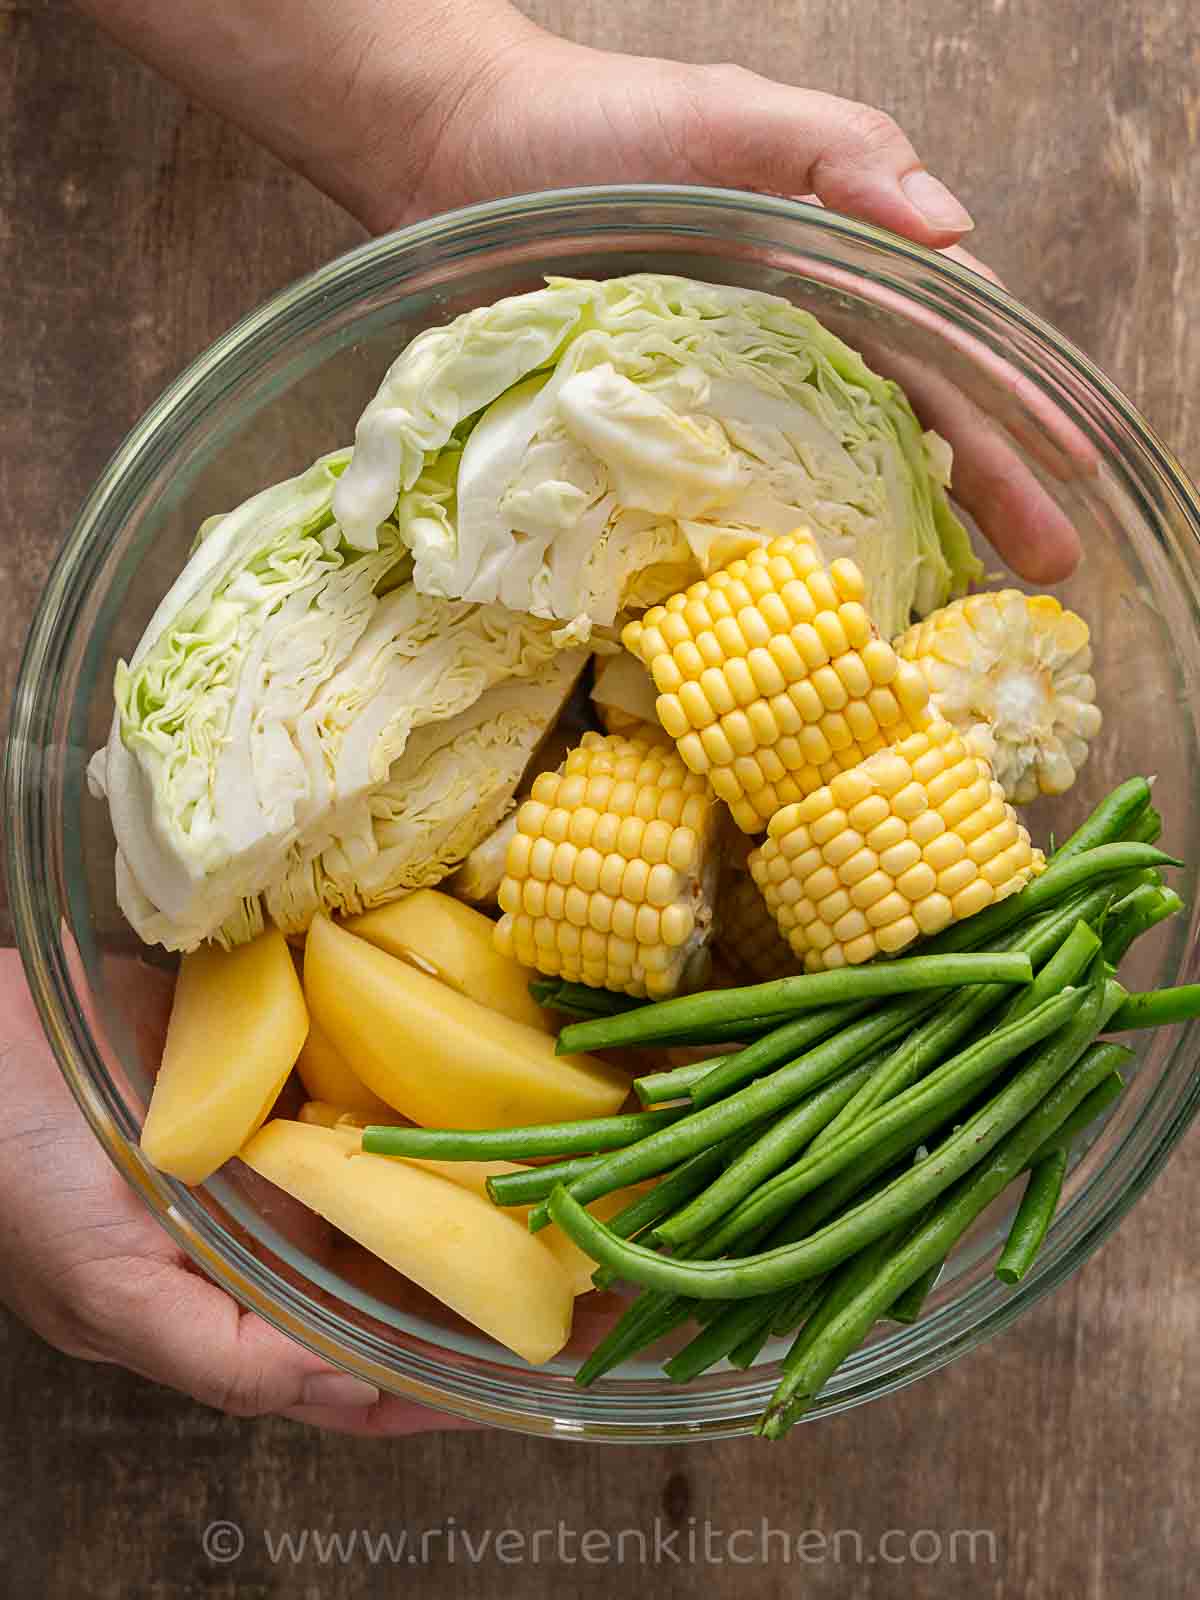
Vegetables for Nilagang Baka
Filipino beef soup, is traditionally packed with a variety of colorful vegetables. While potatoes, green beans, and cabbage form the base, offering fresh flavors, you can customize it to your liking.
Other vegetables recommended
- Corn on the cob
- Carrots
- Pechay
- Long beans
- Chayote
- Baby corn
- Sweet Potatoes
- Lettuce
- Napa Cabbage
- Saba Banana
How to Make Nilagang Baka
Here are my top tips on how to make the best beef nilaga or bulalo at home:
Soaking the beef in cold water for at least 30 minutes, or ideally overnight, helps remove blood and impurities, resulting in a clearer broth. While not essential, this step is highly recommended when time allows. However, if you’re short on time, you can skip this step without significantly impacting the flavor.
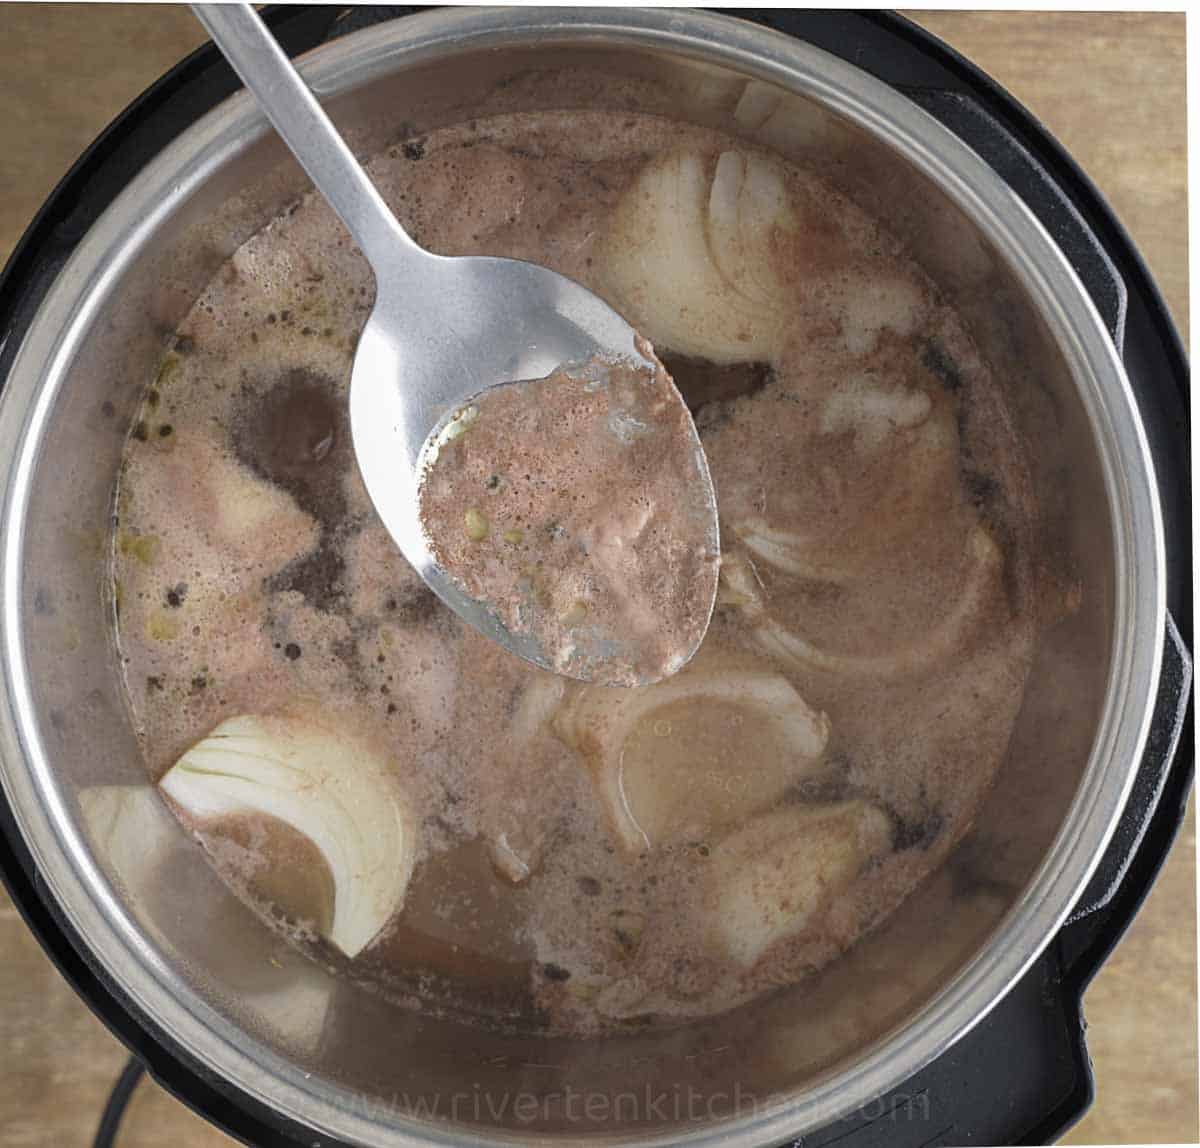
Remove the scum as it arises. Bring the beef to a boil over medium heat to gently release the foam. Regularly skim off any scum that rises to the surface. Use a skimming spoon if available.

Cut vegetables larger. Chopping vegetables into larger pieces helps prevent them from disintegrating and releasing starch that can cloud the broth.
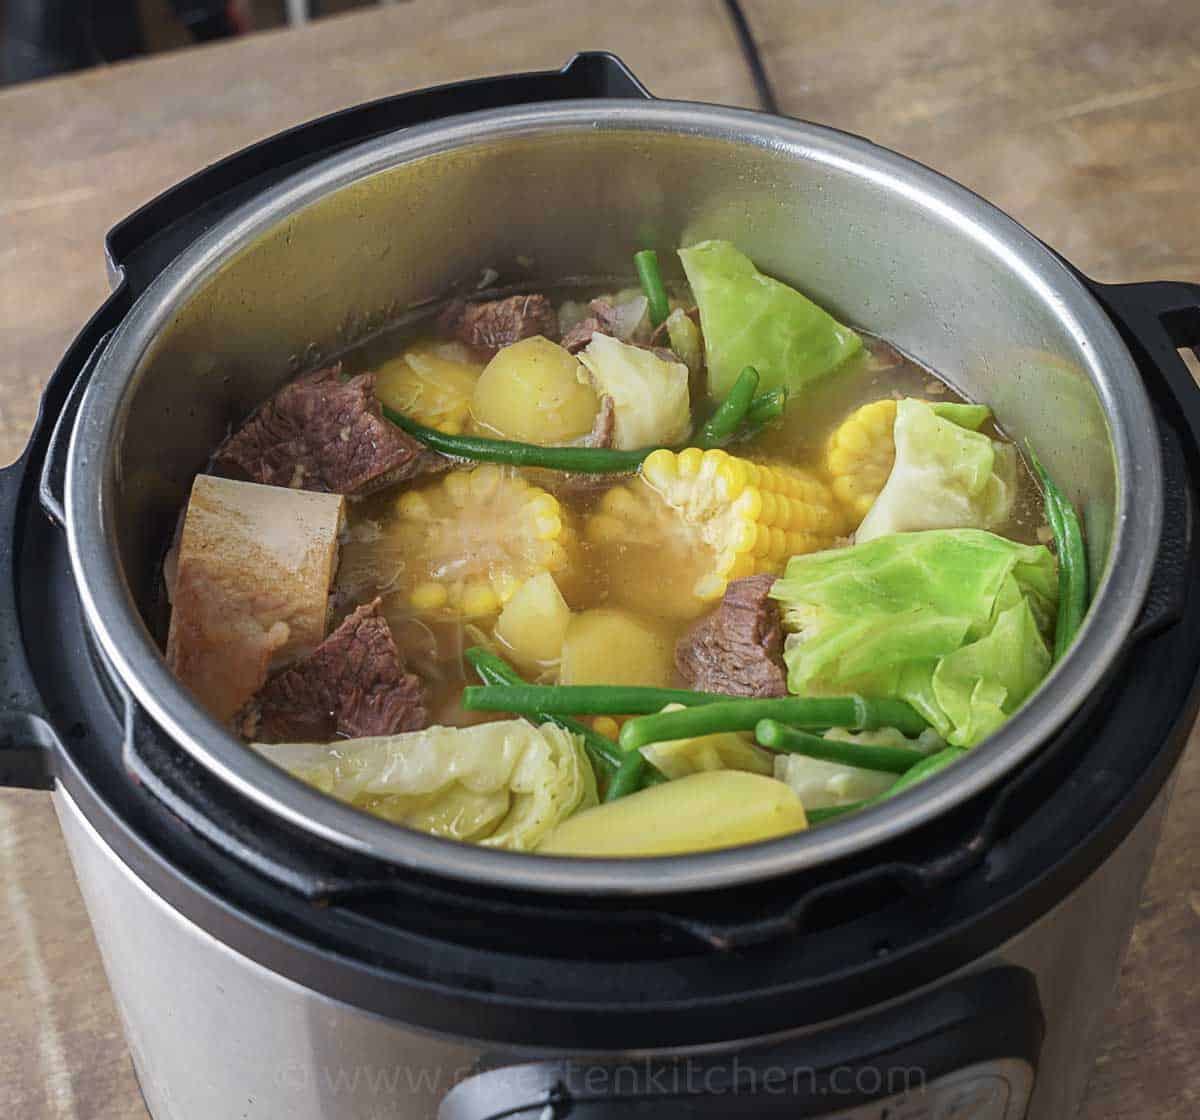
Once the beef is tender, add the vegetables that take longer to cook which include potatoes and corn on the cub. Don’t add them too early or they may become mushy and overcooked.
To make the broth flavorful, add beef bouillon, fish sauce, or salt and whole or cracked black peppercorn.
Cook the green vegetables until just tender yet still crunchy. The residual heat from the beef broth will continue to cook them slightly even after removing them from the heat.
Cooking Time
The cooking time for beef can vary depending on several factors, including the cut and size of beef. Tougher cuts like beef shank or brisket will take longer to become tender compared to softer cuts. Larger pieces of meat will naturally take longer to cook through compared to smaller pieces.
Stovetop
Tough cuts like beef shank or brisket take 2-3 hours or until fork-tender. Softer cuts like chuck roast take 1-2 hours or until fork-tender.
Instant Pot / Pressure Cooker
Tough cuts like beef shank or brisket take 35-40 minutes. Softer cuts take 20-25 minutes, depending on the size.
Important Note: These are just estimates, and the actual cooking time may vary. It’s always best to check the doneness of the meat using a fork.
Serve
Serve nilaga or bulalo straight from a large serving bowl or transfer to an individual serving bowl. Arrange the fish sauce (patis) with calamansi and chopped chili on small plates for easy dipping.
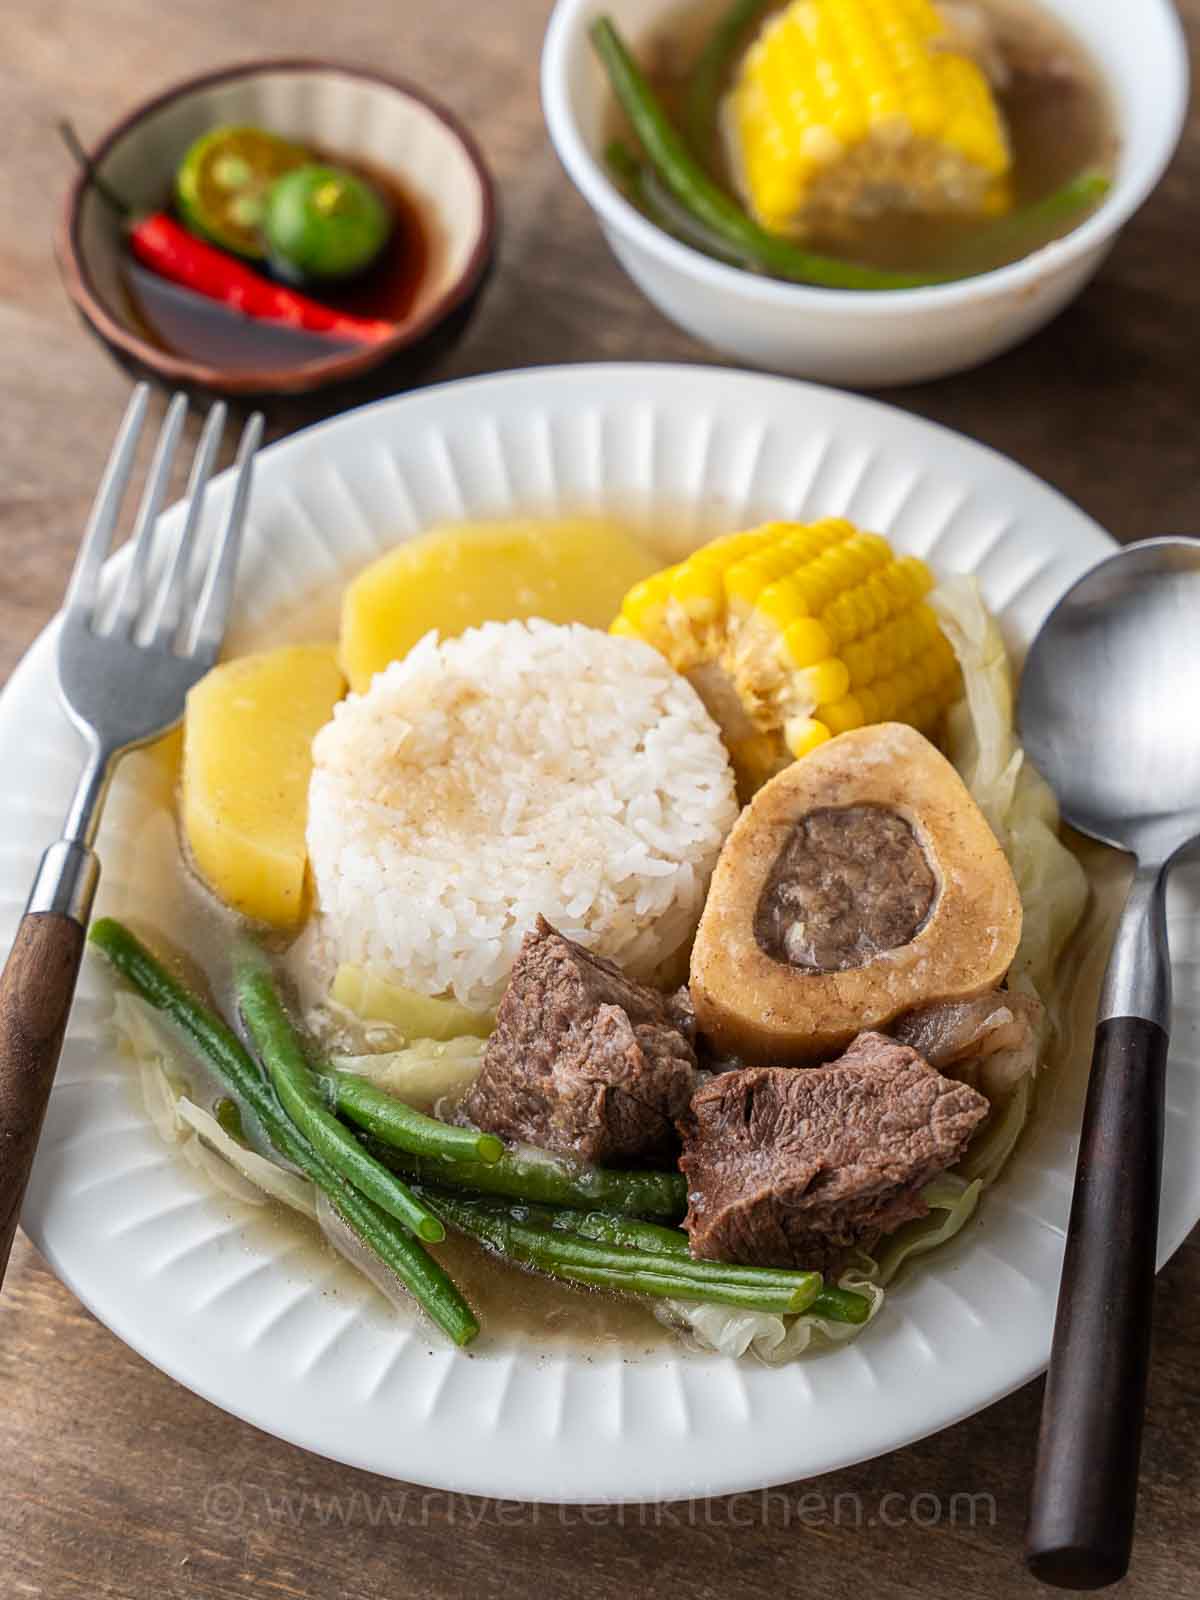
Enjoy with fluffy steamed white rice. A perfect base to soak up the flavorful broth. For Bulalo, it’s customary to serve the bone marrow separately in a small bowl. This allows diners to enjoy the rich and creamy marrow alongside the soup.
Watch How to Make Beef Nilaga (Bulalo)
Nilagang Baka (Bulalo Recipe)
Ingredients
- 2 pounds beef shanks or boneless beef (cut into cubes, note 1)
- 6-8 cups water (add more if needed)
- 1 large yellow onion (sliced)
- 2 teaspoons whole black pepper
- 1 piece beef bouillon
- fish sauce (to taste)
- salt (to taste)
Vegetables (note 2)
- 3 large potatoes (cut to a large wedge)
- 2 pieces corn on the cob (sliced)
- bunch of green beans (ends tripped)
- 1 whole cabbage (or choice of leafy greens)
Instructions
- Soak the beef in cold water for 30 minutes to release the blood. Drain well and discard water. This is an optional step. Skip if preferred.
- Cook beef until tender – Place beef in a large pot or Instant Pot. Pour water until the meat is submerged. Bring to a simmer. Skim off any scum and foam that rises to the surface. Add onion, black peppercorn, fish sauce, and beef bouillon. Cover with a lid and cook until tender. Add water as needed.Instant pot – Do not exceed the MAX fill line inside the pot. Select PRESSURE COOK and set the timer to 35 minutes for beef shanks; and 25 minutes for boneless beef cuts. Lessen cooking time for smaller cuts. When the timer is up, turn the knob to VENTING to quick-release. SEE NOTE 3 FOR MORE COOKING TIME.
- Cook the vegetables – Once the beef is fork-tender, add corn on the cob and potatoes. Include vegetables that take longer to cook. Cook for 5 to 10 minutes until just tender. Taste the broth. Season with fish sauce and or salt and black pepper, to taste.
- Add green beans and cabbage, simmer until just tender. Turn off the heat. Residual heat will continue cooking the vegetables.
- Serve and enjoy with rice with a side of calamansi dipping sauce.
Recipe Notes & Tips:
- Beef – other recommended cuts are brisket, short ribs, and chuck roast.
- Vegetables – you can also use carrots, bok choi, long beans, chayote, baby corn, sweet potatoes, lettuce, napa cabbage, and saba banana.
- Cooking time – Stove top: tough cuts like beef shank or brisket take 2-3 hours or until fork-tender. Softer cuts like chuck roast take 1-2 hours or until fork-tender. Instant Pot: – Tough cuts like beef shank or brisket take 35-40 minutes. Softer cuts take 20-25 minutes, depending on the size.
- Instant Pot – always follow the manufacturer’s guide for safety.
Originally published May 2019. Updated March 2024 with new photos, and a streamlined recipe after further testing to improve the recipe!
Riverten Kitchen is a participant in the Amazon Services LLC Associates Program, an affiliate advertising program designed to provide a means for sites to earn advertising fees by advertising and linking to amazon.com.