
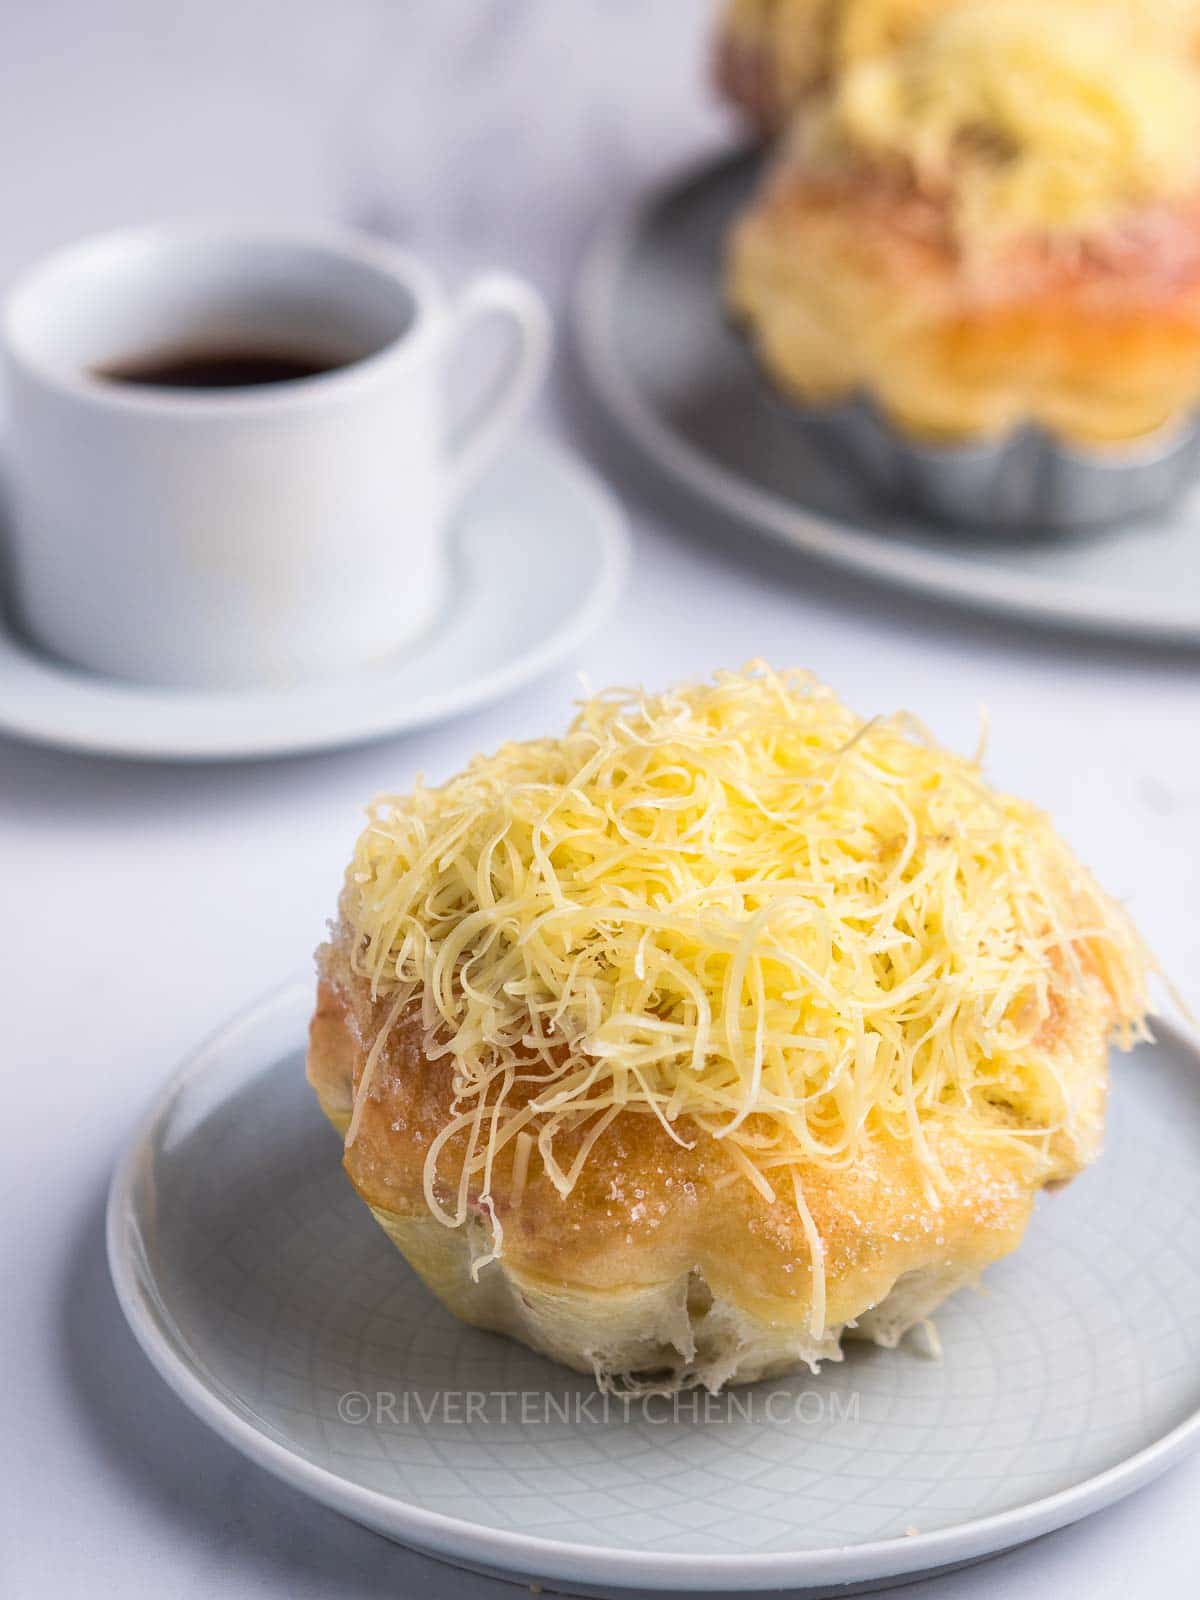
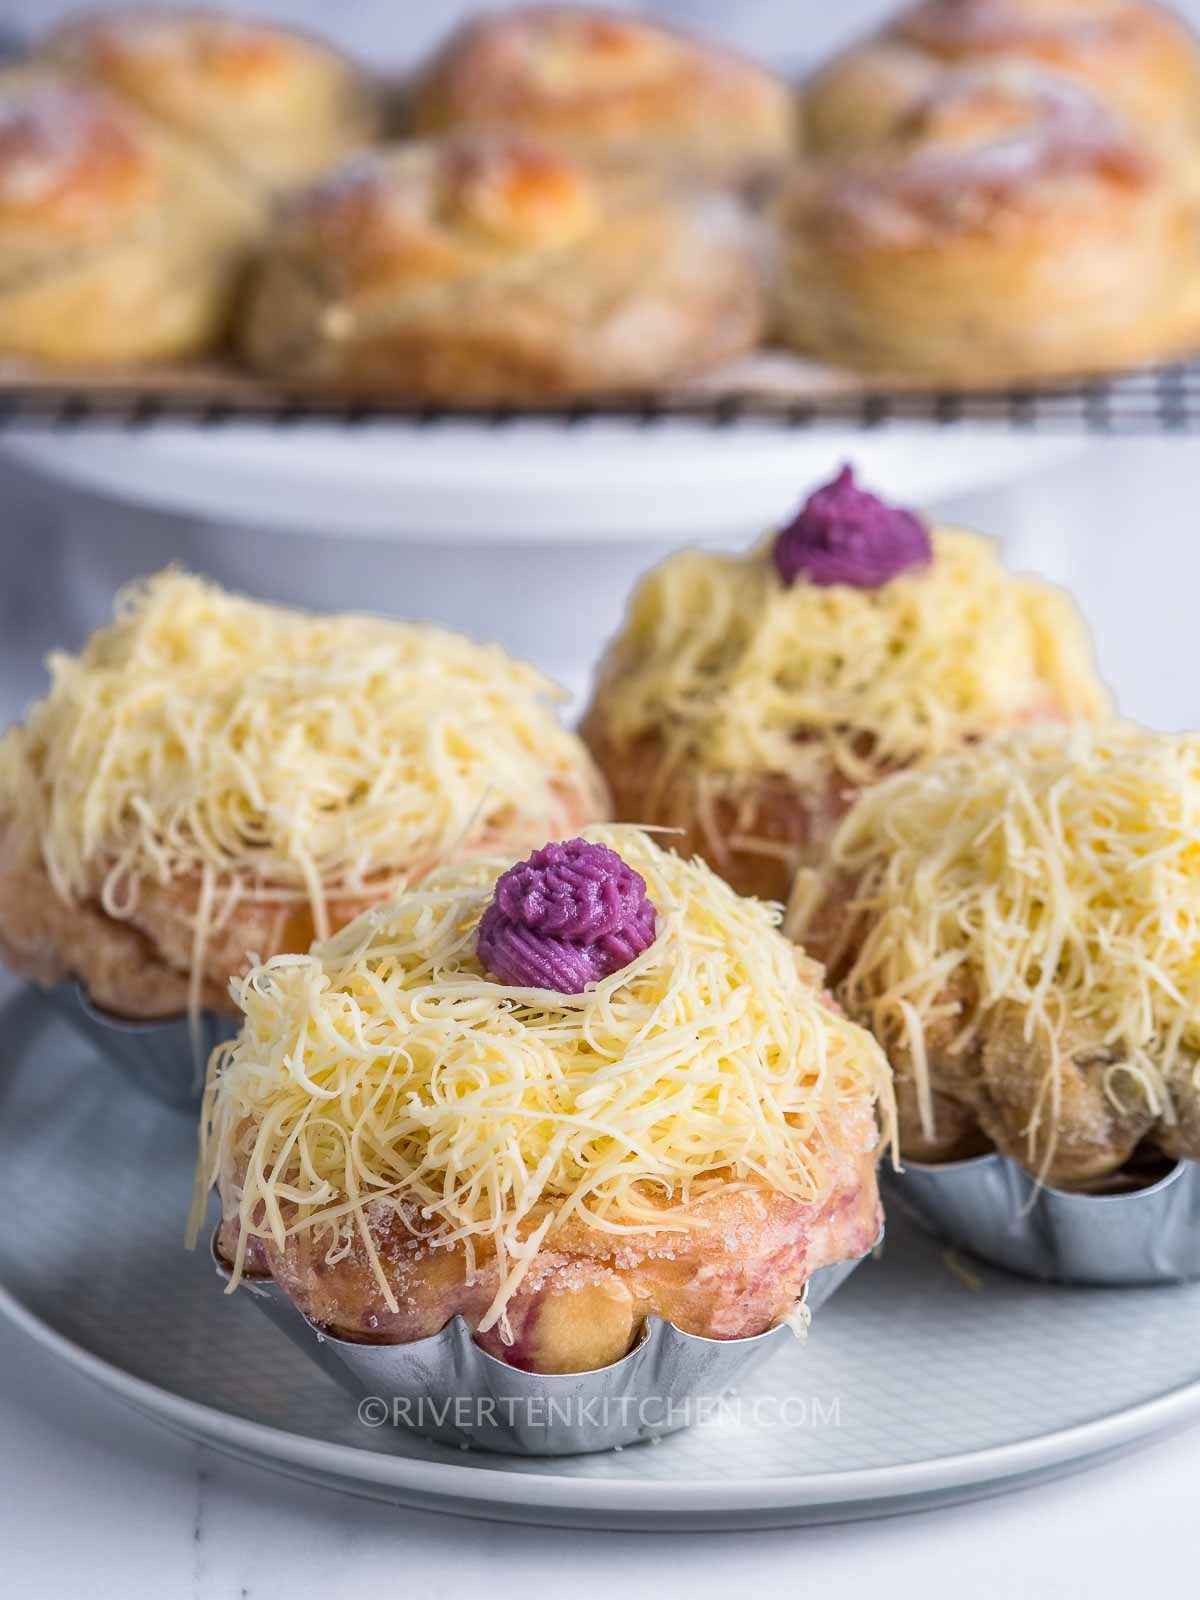
These Super Soft Ensaymada Bread Rolls are the best! It’s light, fluffy, butter-rich, and exceptionally delicious. This is the best and easiest homemade Ensaymada recipe you’ll ever make! Skip using the rolling pin or coiling the dough. You won’t need a special molder either. Make it easier by shaping it into classic bread rolls.
Why you’ll love this Ensaymada Recipe
I have made Ensaymada at home plenty of times for my friends and relatives. I (used to) call it a labor of love because the whole process is quite extensive. It literally takes me one whole day from making the dough, proving, rolling, and then coiling. I still can’t believe I used to do that.
This recipe, on the other hand, is easier, beginner-friendly, and makes the best-tasting ensaymada ever! Try it to believe it!
Soft Ensaymada Ingredients
Here are the ingredients you’ll need to make ensaymada.
- Egg yolks + Whole eggs – This is one of the secrets to a really soft and fluffy dough.
- Pure unsalted butter: There’s no substitute for this. The better the quality of the butter, the better your Ensaymada will be.
- Bread flour and All-purpose flour – Mixing these two kinds of flour allows us to control the protein content of the bread. Which just means that it will give the bread a soft and delicately chewy texture.
- Sugar – We Filipinos love our buns sweet. Sugar is needed to make the dough and also for the butter topping.
- Milk and Water – These will serve as the base liquid for the dough. The water is combined with the yeast to activate.
- Active Dry Yeast or Instant Dry Yeast – Both can be used interchangeably. Activate in lukewarm water until foamy.
- Cheese – Ensaymada will not be complete without cheese. As simple as processed cheddar cheese will work wonderfully for this recipe. Other types of cheese you can use are cheddar cheese, Edam cheese (queso de bola), gouda cheese, and quick melt-processed cheese.
- Salt – A crucial ingredient that makes any bread taste good.
Tips on How to Make Super Soft Ensaymada
- Warm the liquid ingredients such as water and milk. Microwave for 20 to 30 seconds. The liquid needs to be at a lukewarm temperature of around 40c/105f. If it’s too hot the yeast will die. If it’s too cold, the yeast will not activate. Don’t forget to add a teaspoon of sugar to activate quickly.
- Cold semi-soft butter, cut into cubes. Make sure it’s not melting.
- Add additional flour, I added about 4 tbsp more. Knead until the dough is elastic, and pulls away from the sides of the bowl. Do a pane test to check the texture of the dough.
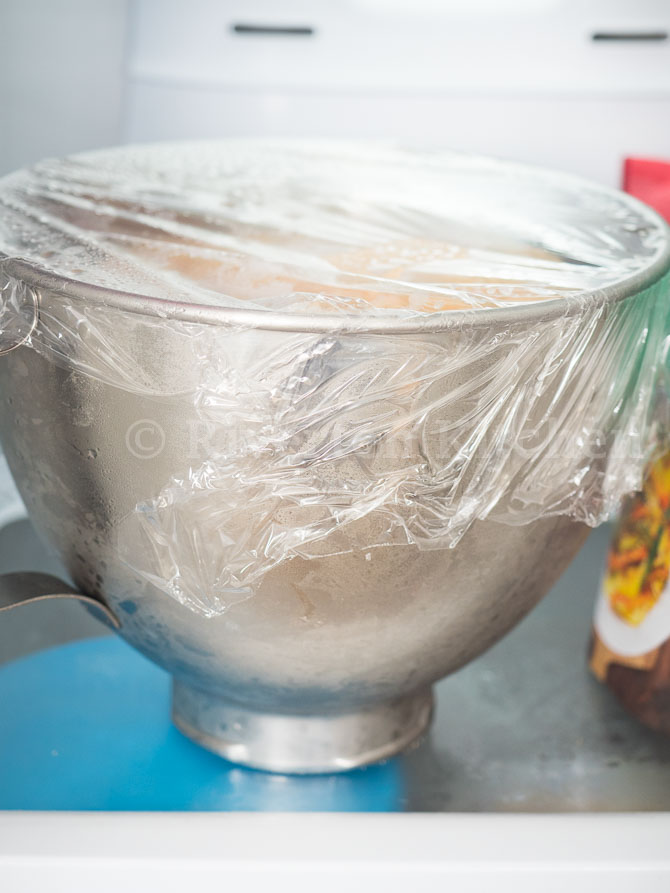
- Cover the bowl with plastic wrap and seal the edges. I find that the yeast activates more quickly when moisture is locked-in in the bowl.
- You can proof the dough in a warm place or do a cold rise by placing the dough in the fridge.
Make ahead tip! I do this all the time
Making Ensaymada is easy. Waiting for the dough to rise, twice at that, is actually the hardest especially if you’re keen on making it in one whole day. But I don’t. Waiting makes me tired and more impatient. So what I always do is make the dough ahead of time and then refrigerate it overnight.
In the fridge, the dough will slowly rise and double in size overnight. Once you’ve finished making the dough, just get on about your day and forget about it for a while. On the day of baking, remove them from the refrigerator 30mins to 1hr before you’re going to shape them into rolls.

These Ensaymada Bread rolls are a perfect gift to yourself, friends, and loved ones as you don’t have to make an extra effort to individually wrap them. You just need one big plastic wrap, tie a ribbon and it’s good to go.
I would love to serve this for Christmas and New Year’s Celebration. Just look at how pretty they are!
Storage
Refrigerate in an airtight sealed container. When properly stored, it can last 3 to 5 days.
Serve and Re-heating
Serve immediately and enjoy with coffee, hot chocolate, or tea. Ensaymada is best served warm. Reheat in the microwave for 20 to 30 seconds.
Ube Ensaymada or Monggo
Another variation of this recipe is ube ensaymada and monggo. It uses the same special dough recipe with delicious fillings. You can make the fillings from scratch or use store-bought for convenience. Get the complete recipe here!
Frequently asked questions
Check out my Beginner’s Guide: Baking with Yeast Bread for more tips.
Technically instant yeast doesn’t need to be frothed but there’s no harm in doing it. Personally, I always want to make sure that my yeast is active before adding it to the rest of the ingredients. As you know, bad yeast = unrisen dough = wasted ingredients.
We don’t want that to happen here, especially with the amount of butter and eggs needed to make this recipe.
The bread flour in this recipe can be replaced with all-purpose flour. Replaced in the same amount as mentioned in the recipe. Bread will just be less chewy with all-purpose flour.
Because of the amount of butter in this recipe, the rising time is longer compared to other bread recipes. Mine took 2hrs and 15mins.
For colder months, I use the oven to prove the dough. Place a glass baking dish on the bottom rack of the oven and fill it with boiling water. Put the dough in the middle or top rack and shut the door. The steam and heat from the boiling water will create a warm environment to help raise the dough.
The molder for ensaymada is called “brioche mold”. They usually come in different sizes. The ones I used are 3 1/2 inches to 4 inches wide. A regular cupcake pan can be used as a substitute. It’s suitable if you want a small size bread. Another option is an “egg tart molder” which also comes in different sizes. All these can be bought online and in most baking stores.
Watch the video on how to make Super Soft Ensaymada Bread Rolls
Hungry for more? Try these recipes…
More Filipino Bread Recipes
Looking for another weekend baking project? You’ll love these recipes too!
- Soft and Buttery Pandesal (stays soft!)
- Soft Spanish Bread
- Filipino Pan de Coco
- Ube Cheese Bread 3 Ways!
- Pandesal with Asado Filling
- Brown Pandesal
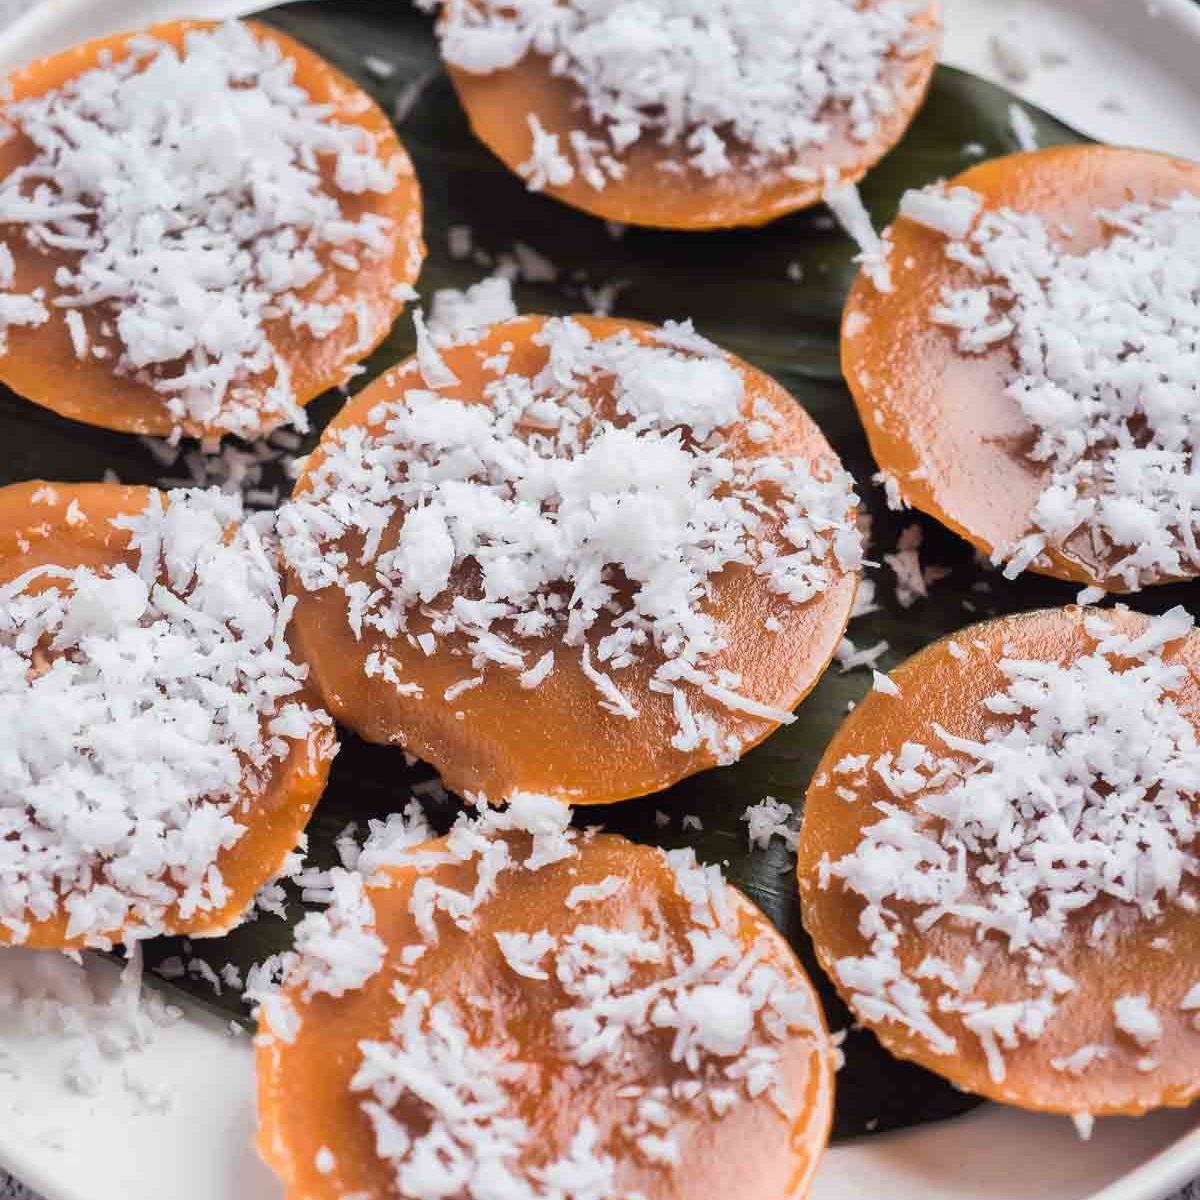
Kakanin

Super Soft Ensaymada Recipe
Equipment
- Baking Pans or Brioche Molder
Ingredients
- 4 egg yolks
- 2 whole eggs
- ¾ cup lukewarm milk with temp 40c/105f (note 1)
- 1 tbsp yeast (active dry or instant yeast, note 2)
- 2 ¼ cups bread flour (plus more for kneading, note 3)
- 2 cups all-purpose flour
- ¾ cup sugar
- 1 ¼ teaspoon salt
- 227 grams / 1 cup cold unsalted butter (cut into small cubes)
Topping
- ½ cup unsalted butter
- ¼ cup white sugar (granulated or fine will do)
- ½ cup grated cheese (I used cheddar, add more if preferred)
Instructions
For the Dough (watch the video, it's helpful)
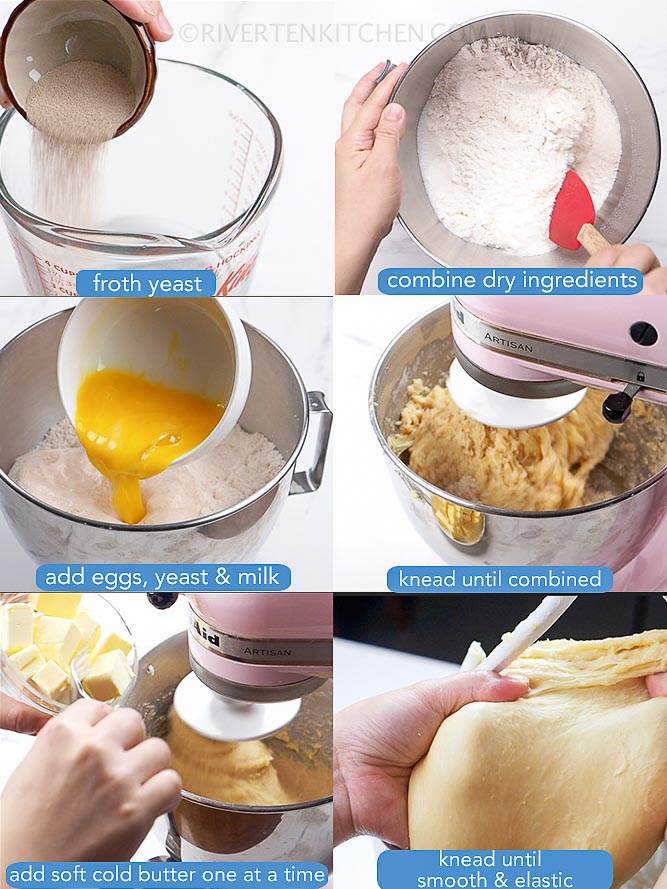
- In a medium-size bowl, combine lukewarm milk, 1 teaspoon of sugar, and yeast. Stir until completely dissolved. Let it stand for 5 to 10mins until it froths.
- Meanwhile, in the bowl of your stand mixer, combine flour, sugar, and salt. Mix thoroughly.
- Add milk-yeast mixture, eggs, and egg yolks to the dry ingredients. Stir with a spatula until just combined. Attach the dough hook and turn the mixer on to the lowest speed and mix until flour is incorporated. about 2 minutes. Scrape down the sides of the bowl as needed.
- Add the cubes of butter one at a time while running the mixer at medium speed. Beat for 5 minutes.
- Increase the speed to high and beat for 15 to 20 minutes. Add additional flour as necessary while kneading, start with 2 tbs, and go from there. I added about 4 tbsp more. After kneading, the dough will be slightly sticky, soft yet stretchy, and pulling away from the sides of the bowl.
Rise # 1 Warm rise or cold rise
- Transfer to a greased bowl. Cover the bowl with plastic wrap and seal the edges. Let it rise for 2 to 3 hours at room temperature until double in size. To make ahead, do a cold rise by placing the dough in the refrigerator. The dough will slowly double in size the next day. See notes 4, 5 and 6 for more information.
Rise #2 Shape the rolls
- Greased baking pan and line it with parchment paper. If using non-stick brioche molder greased it thoroughly specially the flutes. You can use butter or oil.
- Remove the plastic wrap and punch the dough down. Transfer onto a lightly floured surface. Knead for 1 to 2 minutes in a stand mixer or by hand. If the dough is too loose, chill in the fridge for 1.5 hours(see note 6).
- Divide the dough and form into the desired size of rolls (see video). For an evenly sized dough, use a kitchen scale. Mine was about 50g to 60g or 2 ounces each. Adjust based on your preference.
- Transfer the rolls to a baking pan or brioche molder greased with butter. Cover with cling wrap and let it rise until double in size. This could take 1 hour or more depending on the room temperature.
Baking
- Preheat oven at 180c/350f, 15 minutes before the dough rolls finishes rising. Bake the Ensaymada bread rolls for 12 to 15 minutes or until the top turns light brown. Do a check at 10 minutes just to be sure.
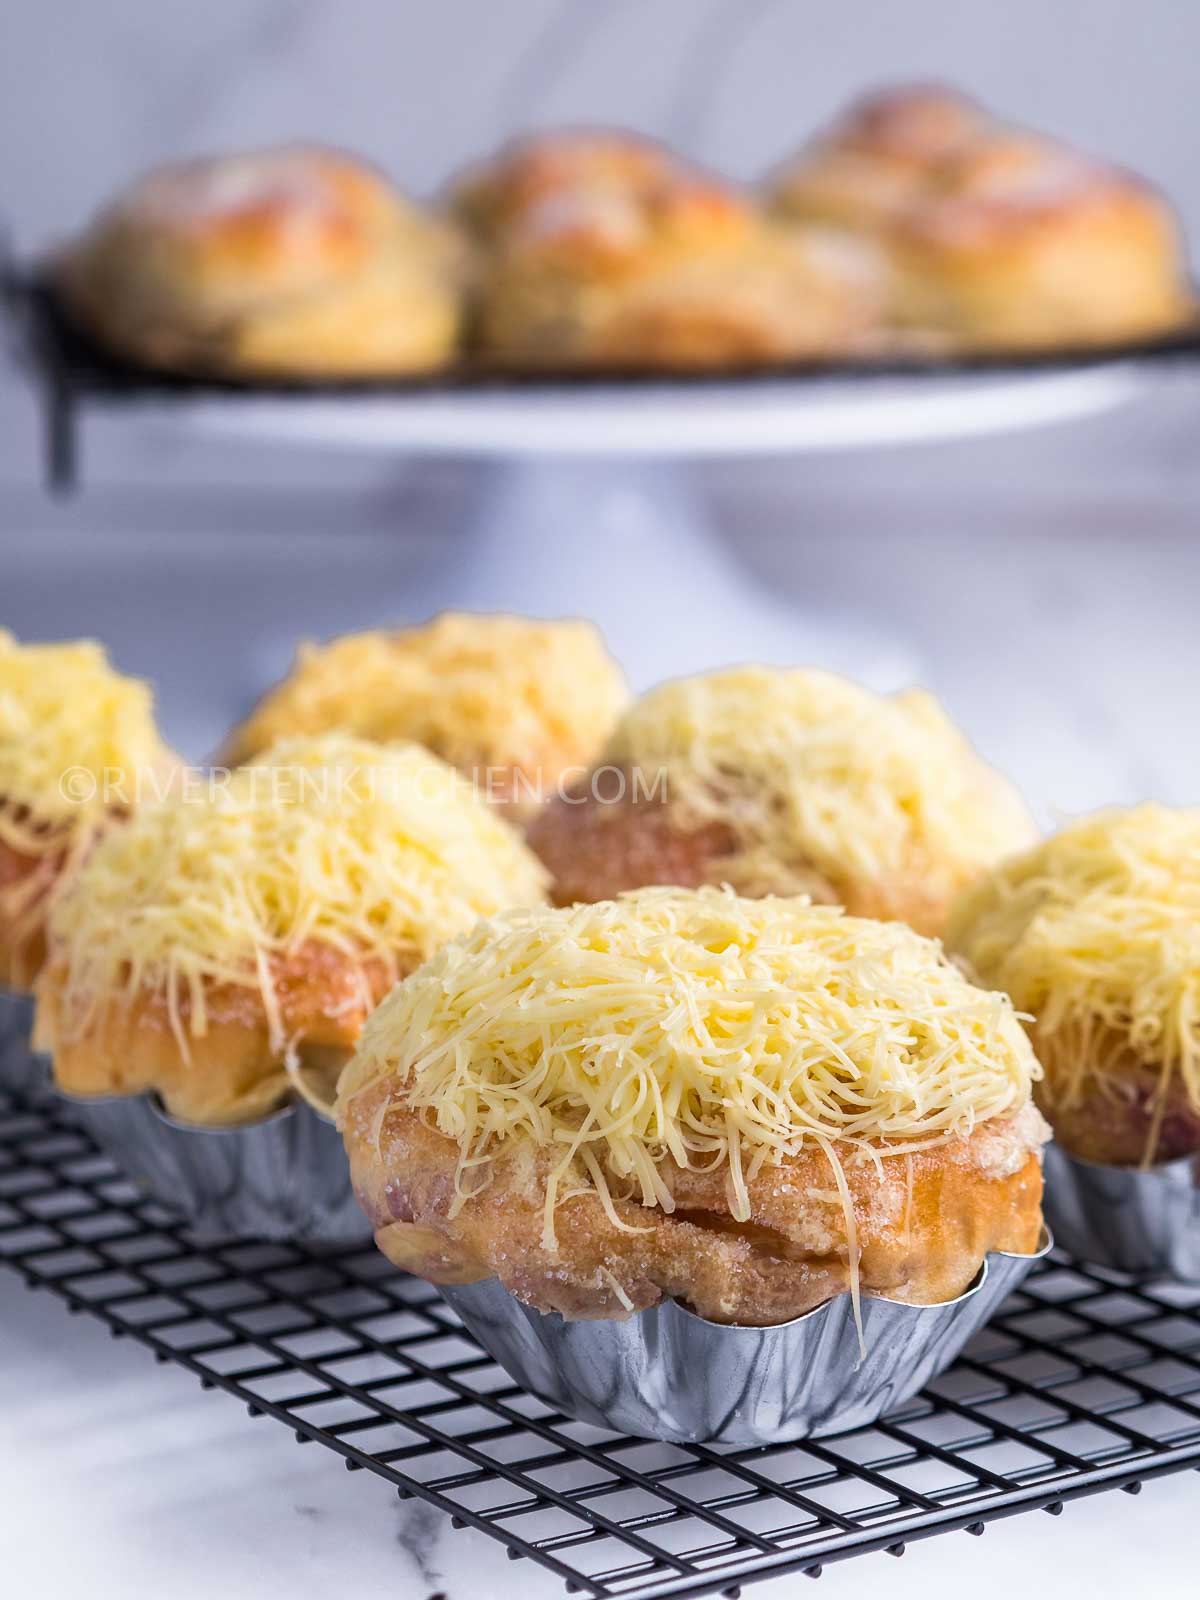
- Let the bread slightly cool then remove from the pan. Place a wire rack and cool completely.
Topping
- Mix butter and sugar. Spread over the Ensaymada bread rolls.
- Sprinkle grated cheese on top. Serve with coffee, hot chocolate or tea. Enjoy!
Recipe Notes & Tips:
- Milk – previously uses 1/2 cup water and 1/4 cup milk. Replaced water with milk which amounts to 3/4 cup milk in total. Use 1/2 cup water if preferred.
- Yeast – you can use instant or active dry. Personally, I always proof my yeast no matter the type to make sure they’re working before adding it to the rest of the ingredients. Note: Do not use stale or expired yeast.
- Bread flour – substitute with all-purpose flour if bread flour is not available. Replaced the same amount as mentioned in the recipe. Bread will just be less chewy with all-purpose flour.
- Rising time: Because of the amount of butter in this recipe, the rising time is longer compared to other bread recipes. Mine took 2hrs and 15mins.
- Proofing in colder months: Place a baking dish on the bottom rack of the oven (DO NOT TURN IT ON) and fill it with boiling water. Put the dough in the middle rack and shut the door. The steam and heat from the boiling water will create a warm environment to help raise the dough.
- Overnight Rising: Make the dough then let it proof for 30 minutes at room temperature covered in cling wrap. Place in the fridge and the dough will slowly rise and double in size overnight. On the day of baking, remove them from the refrigerator 45 mins to 1 hour before you’re going to shape them into rolls.
- Types of cheese recommended: Cheddar cheese, Edam cheese (queso de bola), Gouda cheese, and quick melt-processed cheese.
- Storage/Shelf life: Refrigerate in an airtight sealed container. When properly stored, it can last 3 to 5 days.
- Re-heating: Ensaymada is best served warm. Reheat in the microwave for 20 to 30 seconds. Serve immediately and enjoy with coffee, hot chocolate, or tea.
- Variation: Ensaymada Ube and Monggo – ensaymada bread filled with ube halaya and sweet mung bean paste.
- Ensaymada Molder – the molder for ensaymada is called “brioche mold”. They usually come in different sizes. The ones I used are 3 1/2 inches to 4 inches wide. A regular cupcake pan can be used as a substitute. It’s suitable if you want a small size of bread. Another option is an “egg tart molder” which also comes in different sizes. All these can be bought online and in most baking stores.
Updated June 2021 with new photos, video, and a streamlined recipe after further testing to improve the recipe! **Replaced water with milk to simplify the recipe.


Thank you, Mella for sharing your super delicious super soft ensaymada recipe!!! From now on this is my go to recipe! Trusted and sure na masarap!!!
I’ve tried a dough to rise in the fridge and it never does. I thought I will try with your recipe. I let it rise first halfway in the counter for two hours (at least the dough rose but not fully doubled and then put it in the fridge overnight. The next day the butter of course solidified and the dough was stiff. Since I could not knead it I just divided and shaped it and let it rise. The result is a dense ensaymada but it still tasted good due to the butter. It is soft but dense. I could not wait to have it rise double due to an appointment. That’s is why I put it in the fridge overnight to save me time. Dough does not rise for me in the fridge.
I have experienced the same. I also put mine in the fridge overnight but it didn’t rise. Thought I could bake it in the morning so we could have it for breakfast. Unfortunately, that didn’t happen. Now I have to search for a solution on this.
Hi Eve, Sorry to hear that happened. I hope the dough continued to rise at room temperature. There are many possible reasons why that happened. I’ve summarized them in this post. Hope this helps.
– Mella
Hi Dawn, Sorry to hear the cold rising didn’t work out for you. There are many possible reasons why that happened. I’ve summarized them in this post. Hope this helps.
– Mella
Thank you Mella fir sharing your recipe. I tried it and it was a hit!😋😋😋my guests loved the ensaymada I made for them:)
Celeste
Toronto
Hi Mella, my bread turns out densed and heavy like a biscuit texture. What might be the problem ? The bread tastes very good though…
This is my first try to bake a bread recipe.
Thanks a lot..
Hi Grace, Check out my Guide to Baking with Yeast. I hope it helps. And please do try again 🙂
– Mella
I mustve done something wrong. It came out dense.
bloomed instant dry yeast 10min
followed insteuctions to a T
Mixing:
2min
5min
15-20 min
4hr rise
1.5 hr second rise
17min at 350
2 1/4 cup bread flour
2 cup flour
what did i do wrong?
Hi Marisse, Sorry to hear that happened. Looks like you did it right. How was the dough during rising? Did the size double and became airy? Maybe these tips will help.
– Mella
Had anyone tried using bread flour only as opposed to mix of both BF and APF?
Hi Chits, Using just bread flour will yield chewier bread but still definitely soft.
– Mella
Hi! Do you have a tutorial or any tips on how to do this without a stand mixer?
danke, the tips are very helpful. I will try this out.
Hope you enjoy it 🙂
– Mella
Great recipe, it’s a challenging task but the layout and instructions it laid out in an so easy to follow steps with tips. Thank you.
Love the updated recipe video! It really helps to watch the video when following the recipe because you will know if you are doing it right. This is the best ensaymada recipe I have tried! Will do it over and over again. Thanks Mella!
Thanks for the wonderful feedback, Steph. Glad you enjoyed the video recipe.
– Mella
I cannot agree more, the recipe for steps and the updated video really help when following the steps. Thank you for the great recipe.
Hello Can I coil it instead of making them like rolls and if I can spread butter before coiling them?
Yes, that’s perfectly fine 🙂 Making them into rolls is just an easy way of making Ensaymada. Coiling is definitely the way to go if you enjoy doing it.
– Mella
Hi I love this easy to follow recipe! I’ve just made my dough and patiently waiting for the first rise. I do have a minor comment though.
On your ingredients list it says cold butter, which is what I used.
But on your notes, you said softened butter incorporates better in the dough..
anyways I’m waiting for the first ride and I hope it turns out well! Thank you for sharing your recipe !!
You’re welcome, Kamille. I hope you enjoyed this recipe. It should be soft yet still cold butter. Some butter tends to get warm and get very soft. Thanks for highlighting this. I’ll update my notes.
– Mella
Hi there
I just love your recipe.
Can I double the batch? If so do I double the yeast? I always make my dough and place it in the fridge for the 1st proofing now. Your right makes life so much easier.
Also if I’m making a bigger batch can I just use 1 large pan to bake them in like an aluminum lasagna pan or roasting pan ?
Does depth of the pan matter with baking this breads? Like if it’s too deep will it hurt my breads?
Thank you you are amazing and thank you for sharing
thank you for this amazing recipe!! we did it perfectly! Still soft even after 2 days! Yummy! Its perfect with coffee every morning.. 🙂 i cant wait to try banana cake…
Glad you enjoyed this, Jong and Pat! The banana cake is a family favorite. So excited for you to try it!
– Mella
hi mella! thank you for your recipe, i cannot wait to try it 🙂
your recipe does not require the dough to be coiled (less time to prepare which i am def a fan of! haha) but i’ve seen a lot of ensaymada recipes that require the dough to be coiled. what is the difference between coiling and not coiling the dough? does it make a difference in texture?
Hi Cheryl, coiling is more for aesthetic purposes.
I find it useful though when doing the Ensaymada Monggo variation which local bakeries in the Philippines do.
– M