Here’s how to make peanut butter from raw peanuts. Make it chunky or smooth. Steps on how to pan roast and get the skin off quickly and easily included!
Homemade Peanut Butter
I love peanut butter.
My pregnancy cravings when I was pregnant with my little girl was PBJ sandwich. I would eat it for breakfast, snack, and mid-night snack.
So learning how to make it from scratch was one of the most fun things I’ve ever done this year. I was always curious how it would compare to the store-bought natural peanut butter I’ve been buying for years.
The outcome was a big surprise.
Why you’ll love this homemade roasted peanut butter
- It is so quick and easy to make. Because we are using just 2 cups of raw peanuts, we can dry roast it in a hot pan which will take about 4 to 5 minutes vs 20 minutes in the oven (including pre-heating),
- It tastes so good! Naturally sweet, and you can really smell and taste the freshly roasted peanuts.
- You can add other flavoring ingredients like salt, honey, and cocoa powder. And the best part? You can control how much to put in!
Tips on making your own peanut butter at home
- Use raw peanuts. The freshest you can get. With the red skin on. It tastes better than store-bought roasted peanuts and smells so good after roasting.
- When dry roasting, make sure all the nuts are touching the surface of the pan so they brown evenly. I suggest roasting the nuts in two batches, 1 cup at a time.
- Use a good quality food processor or blender with a strong motor power that can hold a large quantity of food. Mini food processors that are meant only for chopping soft vegetables like onions and garlic may easily break if you use it to make peanut butter.
Frequently asked questions
After roasting, let the peanuts sit until cool enough to touch. Spread in a dry kitchen towel and wrap it around. Rub the nuts against each other until all the skins are off.
After this, you can easily separate the nuts from the skin either by picking them off the towel or use a fan to blow the skins out. The latter could be a bit messy so I suggest doing it outside of your house 🙂
Yes, definitely. I highly recommend using the oven if you’re roasting more than 2 cups of peanuts. Note that the whole process will be longer because you will need to pre-heat the oven.
Store in an airtight jar or glass container with a tight lid. Before placing the peanut butter, carefully pour hot water into the jar (make sure it’s heatproof) to quickly sterilize. Let it completely dry.
Homemade peanut butter should be consumed within 3 to 6 months and must be stored in the fridge.
Try these recipes
HUNGRY FOR MORE? Subscribe to my newsletter and follow along on Facebook, Pinterest, and Instagram for all of the latest updates.

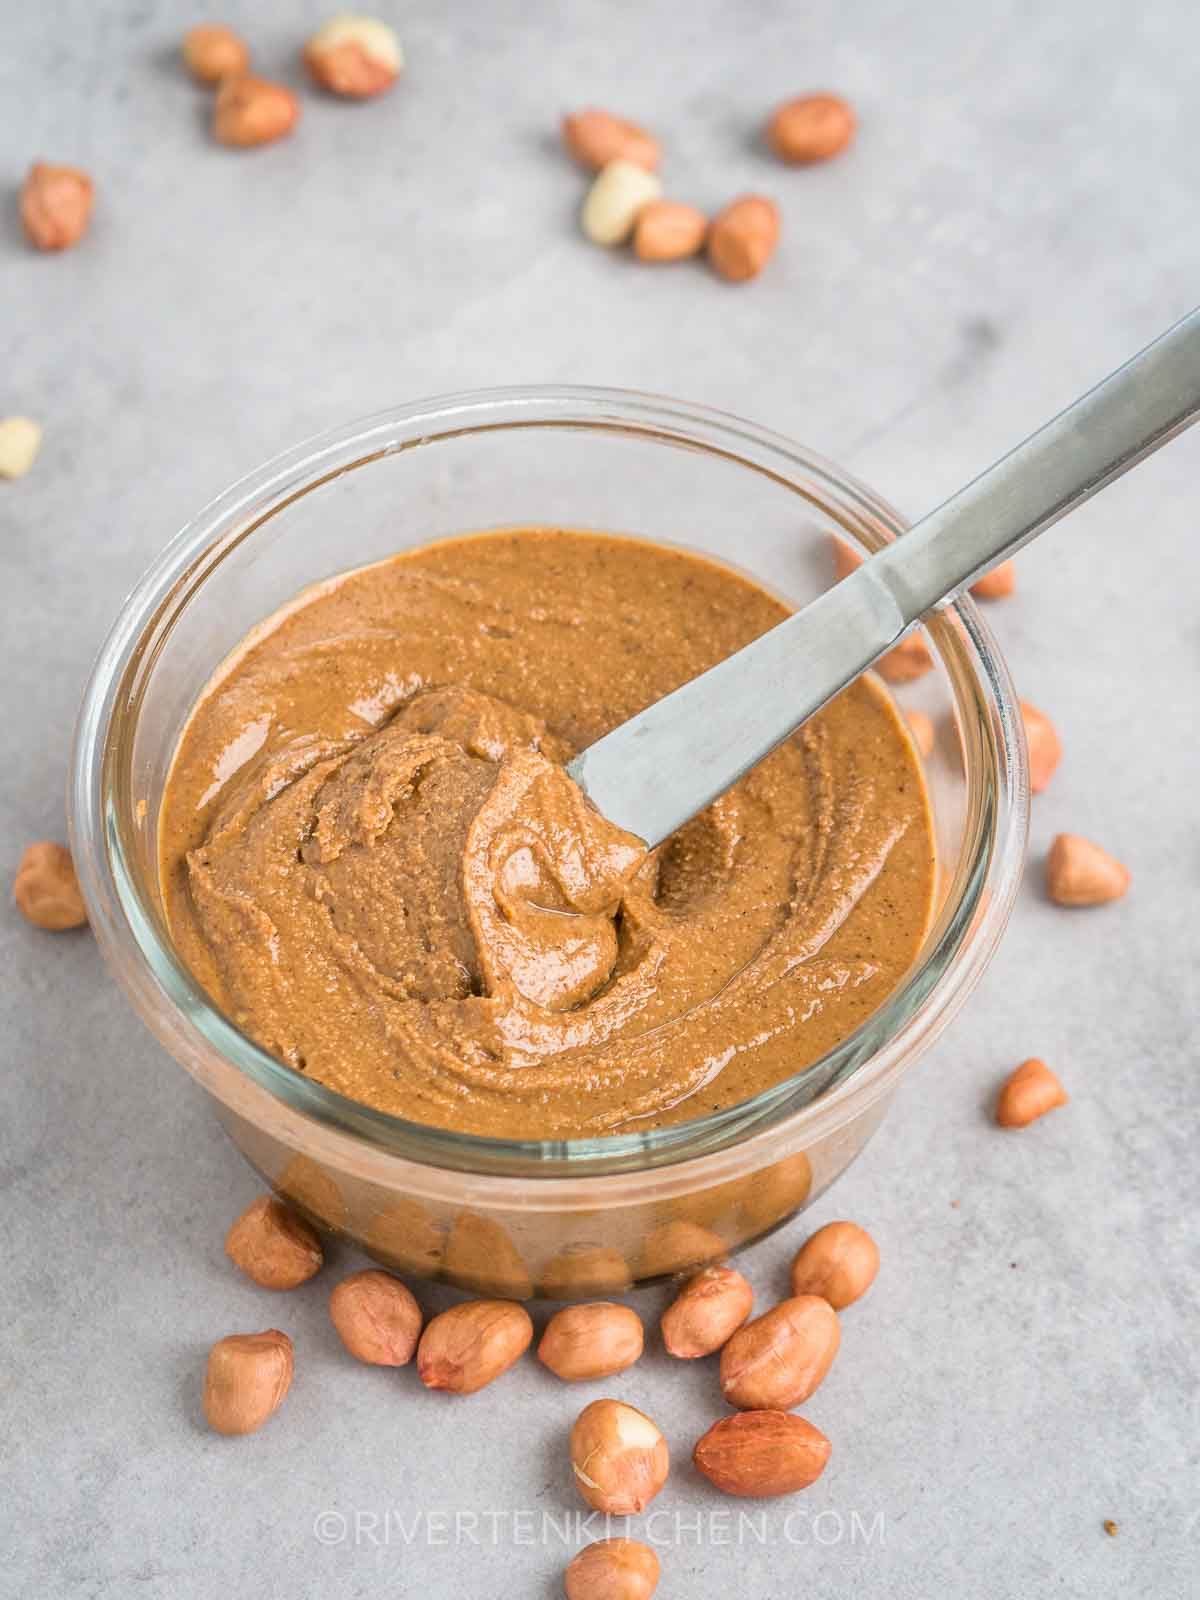
Homemade Roasted Peanut Butter
Ingredients
- 2 cups / 10.58 oz raw peanuts with skin/seed coat
- salt (to taste)
- honey or sugar (optional, to taste)
Instructions
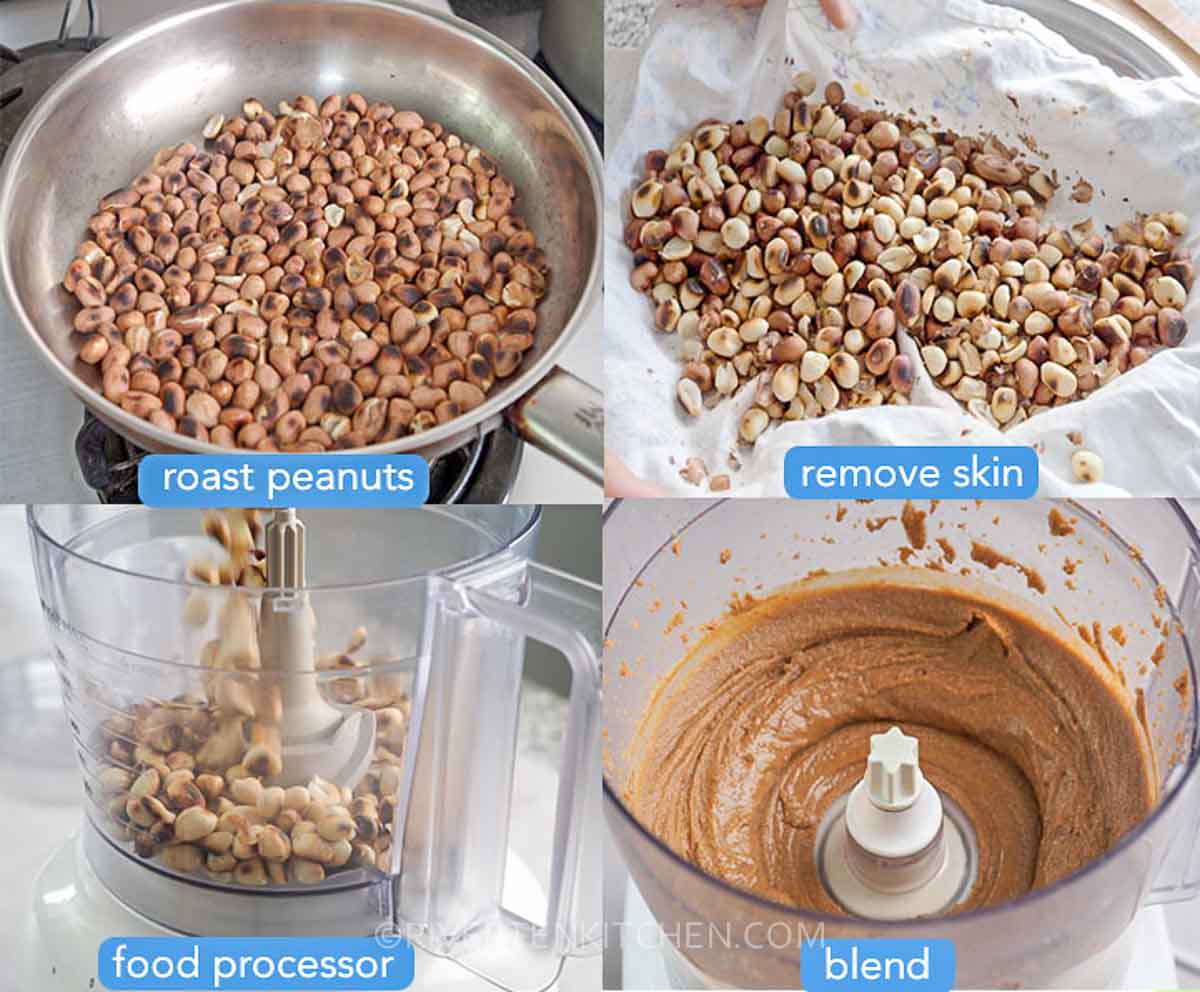
Pan-roast the peanuts
- Spread a single layer of peanuts in a warm (not hot) wide skillet over medium heat. Make sure all the nuts are touching the surface of the pan so they brown evenly. I suggest roasting the nuts in two batches about 1 cup at a time if you have a small skillet.
- Shake the pan or use a wooden spoon to stir every now and then until the nuts are brown and fragrant, about 4 to 5 minutes. Watch closely because they could easily burn. It should start smelling like popcorn when the nuts are done cooking.
- Remove immediately and transfer to a plate to prevent residual heat from burning the nuts. Let it sit until cool enough to touch.
Remove the skin from the peanuts
- Spread the peanuts in a dry kitchen towel. Wrap the nuts and rub them against each other. Do this a couple of times until all the skins are off.
Make the peanut butter
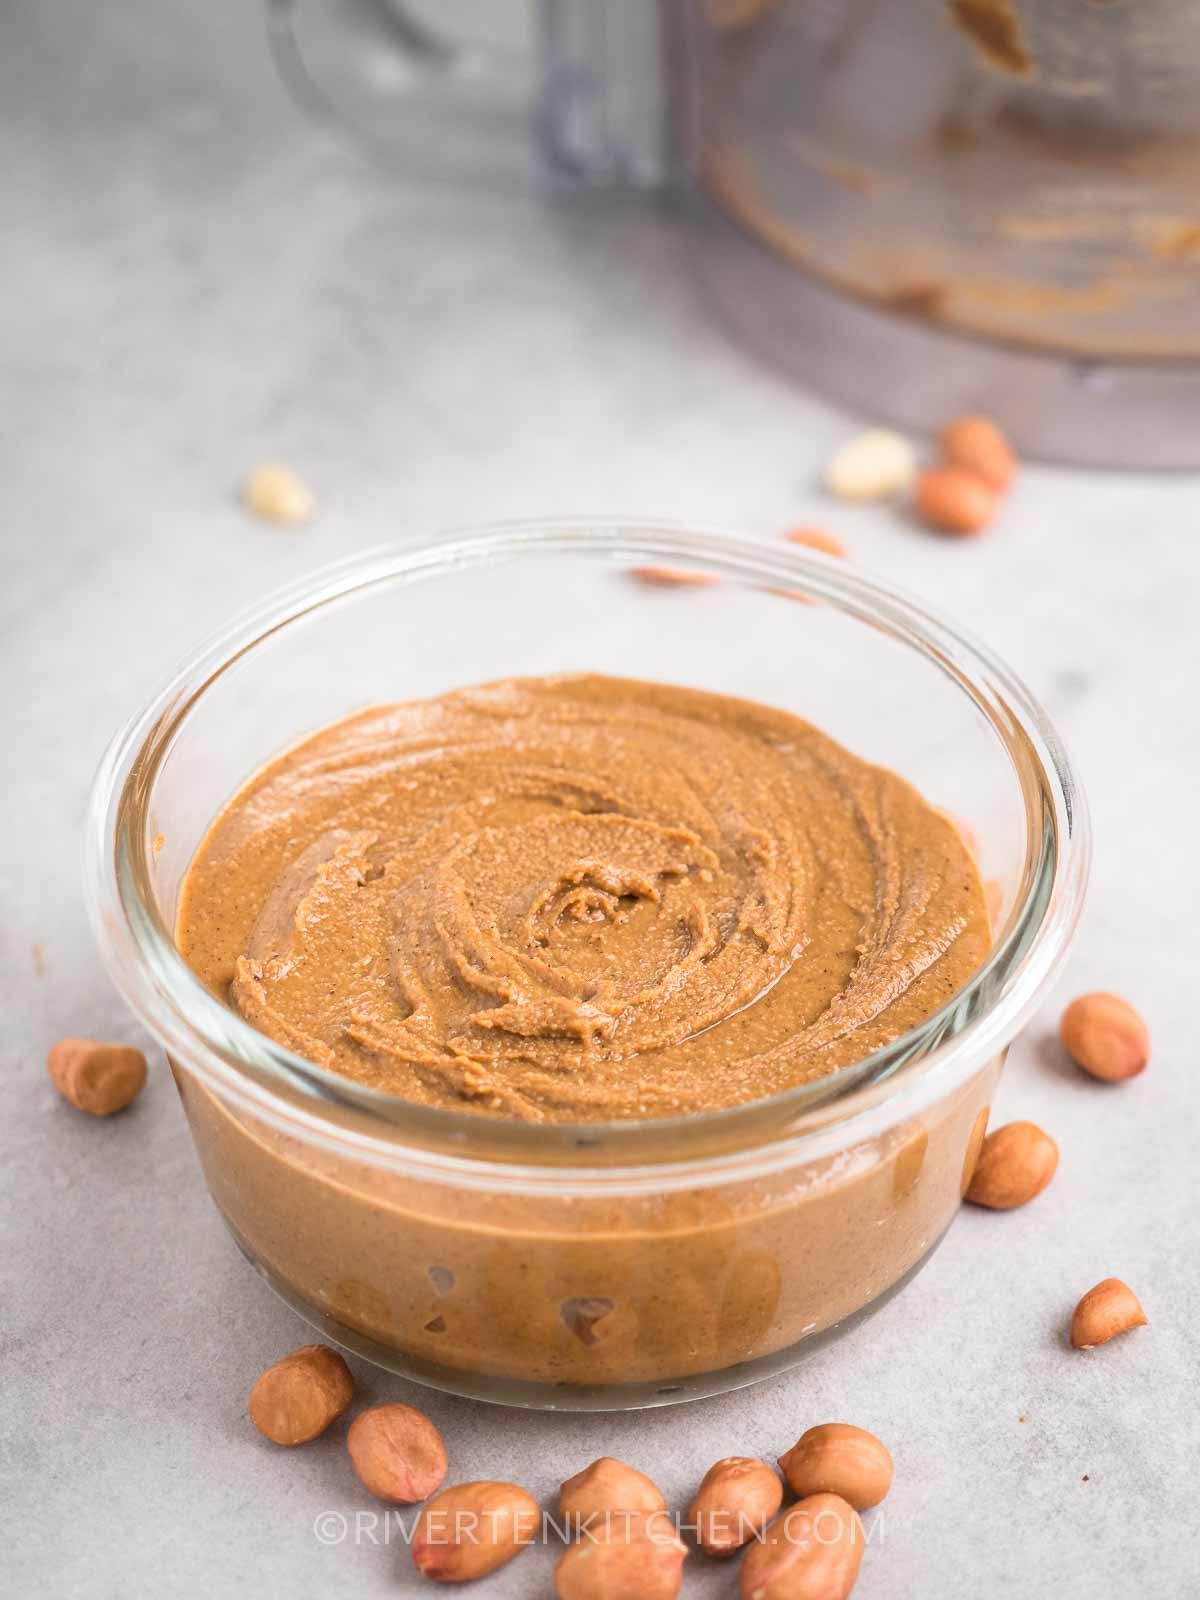
- Transfer the peeled peanuts to a food processor or high speed blender. Blend until creamy, pausing to scrape the sides as needed or when it becomes clumpy. If the mixture gets hot stop and let it cool for a couple of minutes. Continue blending until texture becomes creamy.
- Taste the peanut butter and season with salt or honey if you want it sweeter. Blend again to combine.
- Transfer to a airtight jar or glass container with a tight lid.