
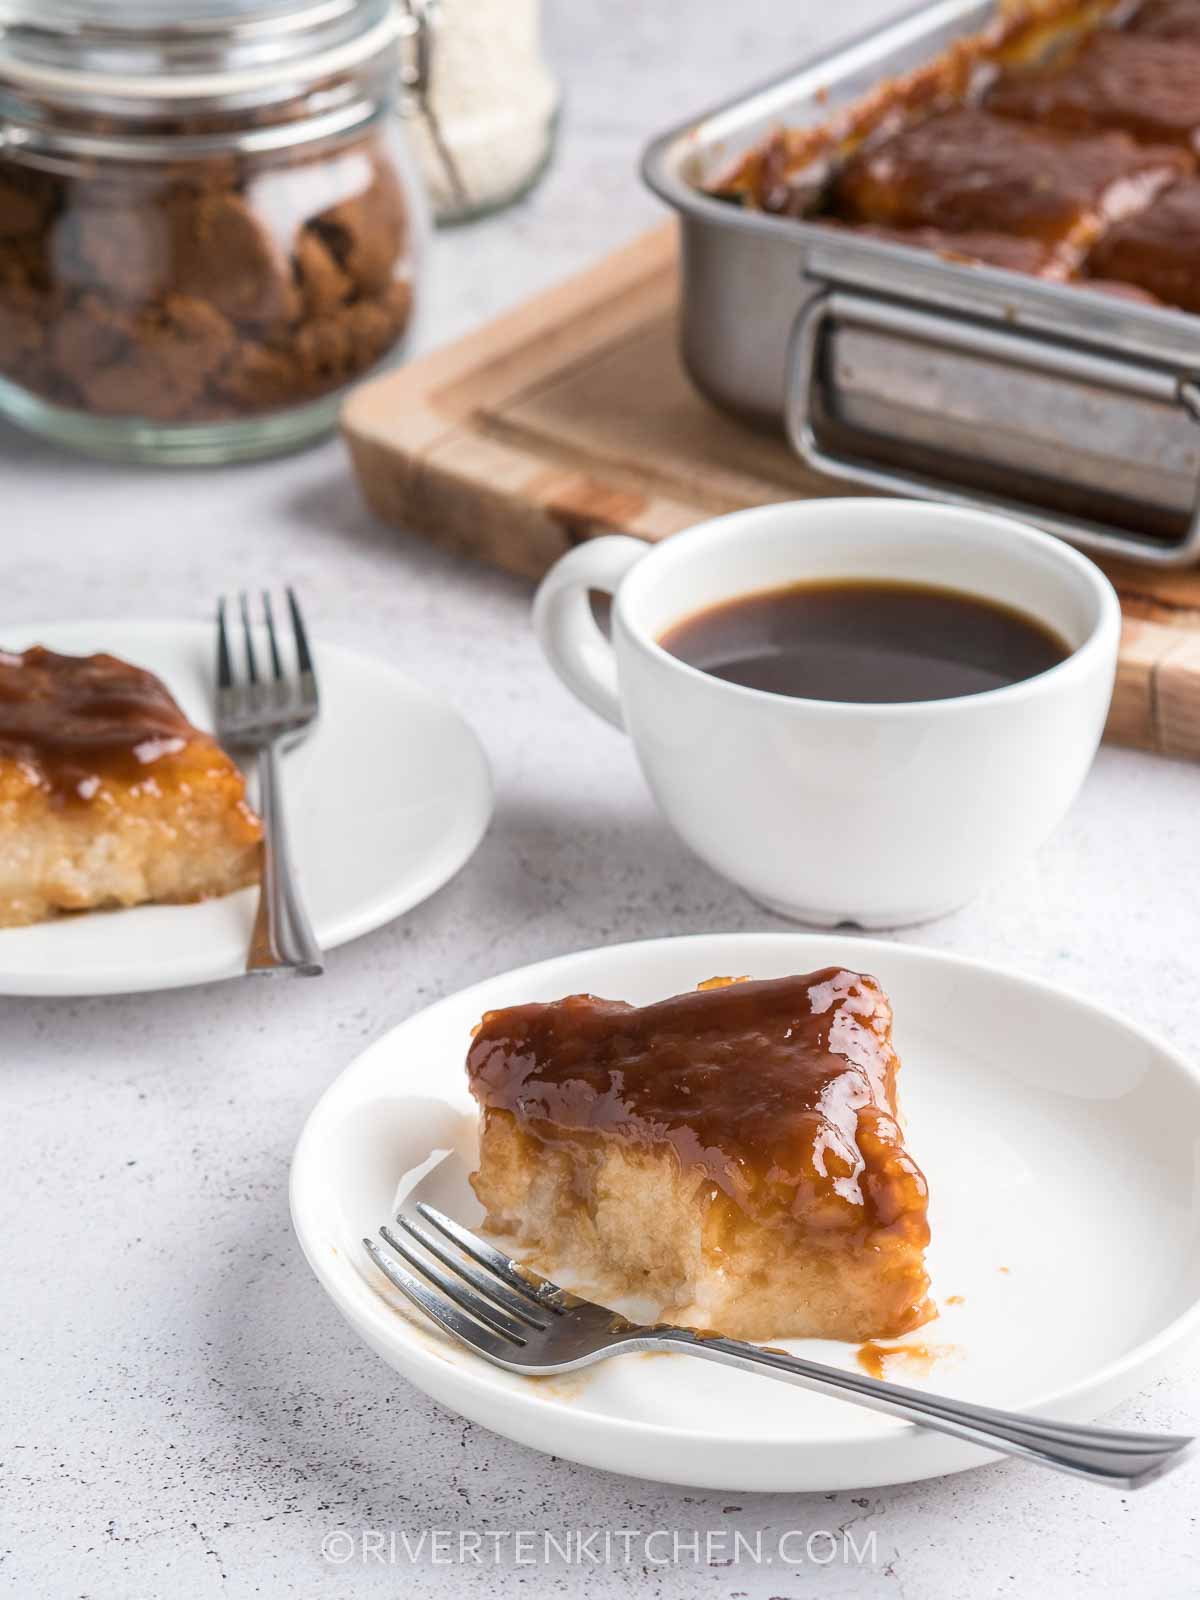
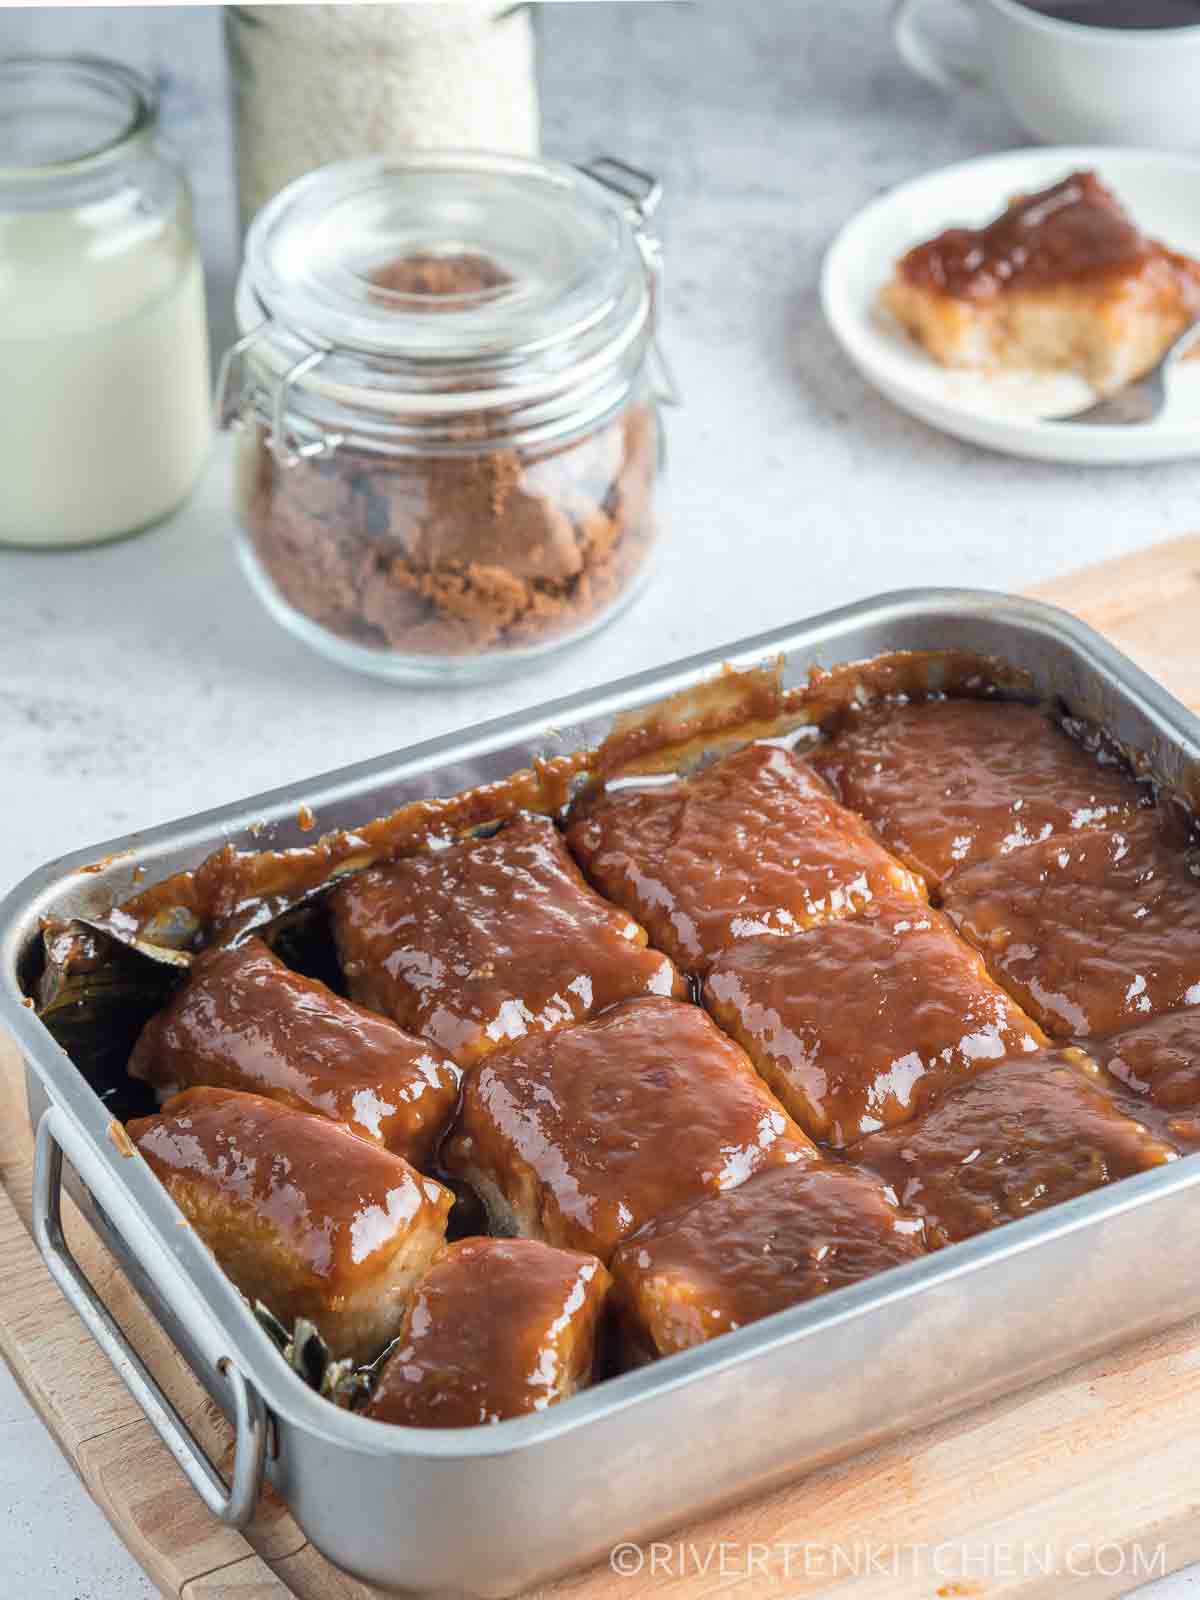
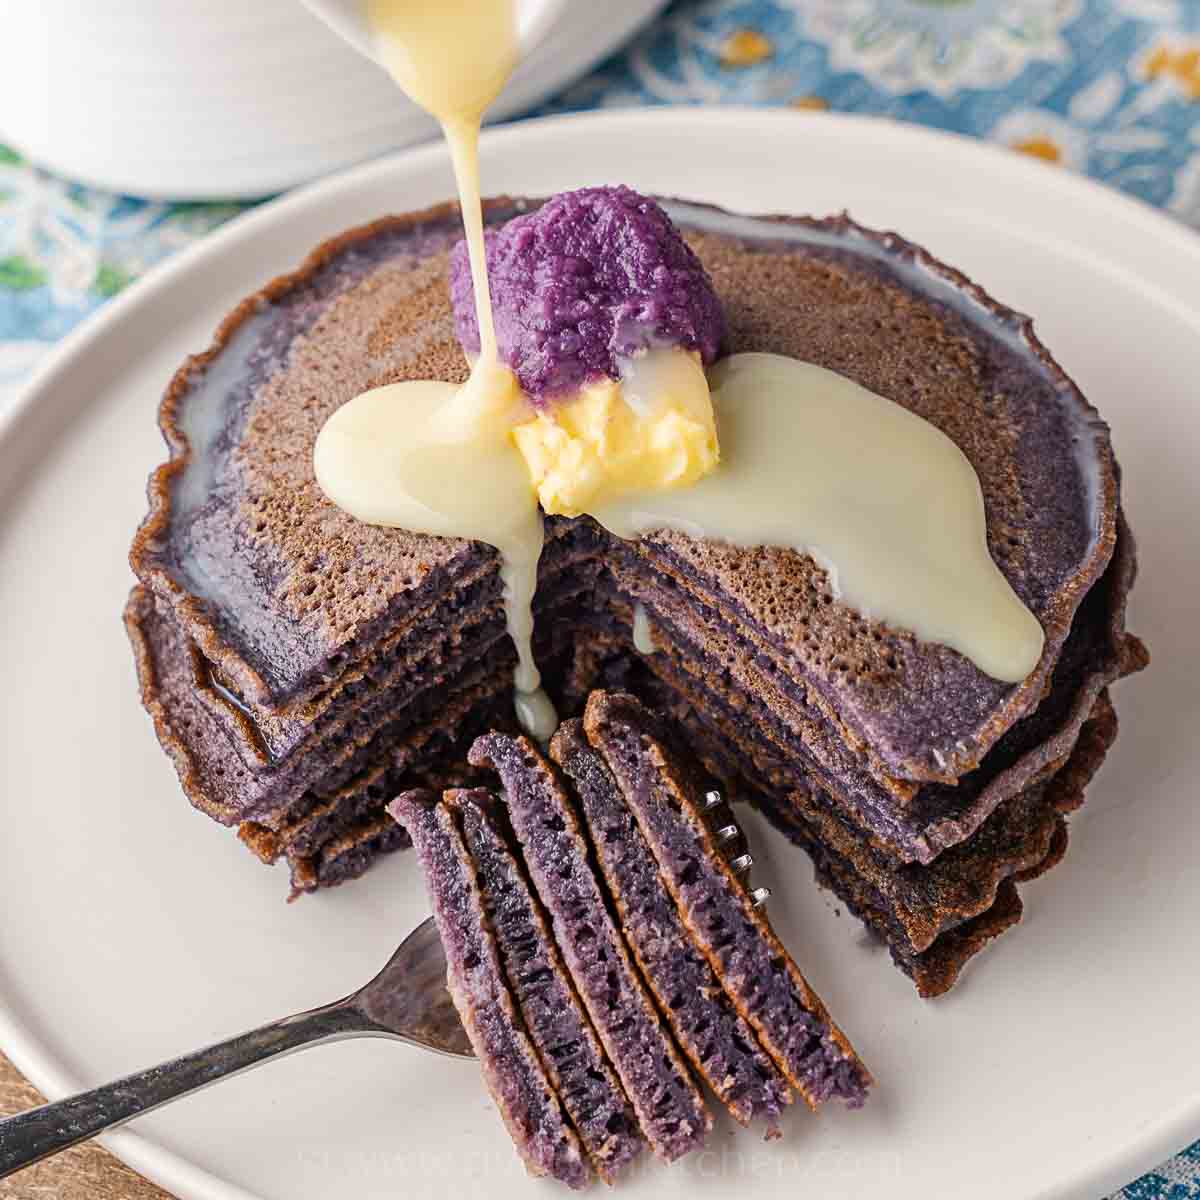
Bibingka malagkit is a Filipino-style coconut sticky rice topped with caramelized sugar-coconut syrup on top. This sweet and sticky cake is a favorite holiday dessert eaten on Christmas and New Year.
Here you will learn how to make a homemade version using simple ingredients that you probably already have in your Filipino pantry.

Bibingka Malagkit (Coconut Sticky Rice)
Bibingka Malagkit is a traditional Filipino dessert that is known for its sticky and glutinous texture. “Bibingka” refers to a type of rice cake, while “malagkit” means sticky or glutinous in Tagalog.
This delicious treat is made primarily from glutinous rice, also known as sticky rice or sweet rice, coconut milk, and sugar for sweetness.
Bibingka Malagkit vs Biko
“Isn’t bibingka malagkit the same with biko?” is the question I often get when talking about sticky rice cakes. And, my answer has always been inconclusive, yes, and no.
You see, the ingredients and process of making both rice cakes are so similar. Both are sticky and sweet with rich coconut flavor. The rice in the bibingka is sweetened with white or light brown sugar while biko primarily uses dark or brown sugar.
What differentiates bibingka malagkit with biko is the topping–bibingka malagkit is glazed with latik syrup made of coconut milk and muscovado sugar while biko, the “traditional biko” that is, is topped with latik curds.
However, many biko recipes nowadays include latik syrup. Call it “modern-day” biko, if you will. There’s definitely nothing wrong with that. It’s really a matter of personal choice.
Ingredients
To make bibingka malagkit, you will only need five ingredients.
- Glutinous rice – is also known as sweet rice or sticky rice. You can find this in many Asian supermarkets and popular online stores.
- Coconut milk – to make it simpler, I used coconut milk for both the rice and the latik. For the latik, coconut cream is recommended. Use that, if available.
- White Sugar – is what I used for the rice to make it lighter in color.
- Muscovado sugar – or dark brown sugar is highly recommended. It’s rich in natural molasses, making the syrup darker in color and nuttier in flavor.
- Salt – is a vital ingredient in any sweet dessert recipe. It gives balance to the latik and makes it not cloyingly sweet. In short, “pangtanggal umay”.
How to Make Bibingka Malagkit
And here’s how to make it:
1. Make the Latik Syrup (Caramel Topping)
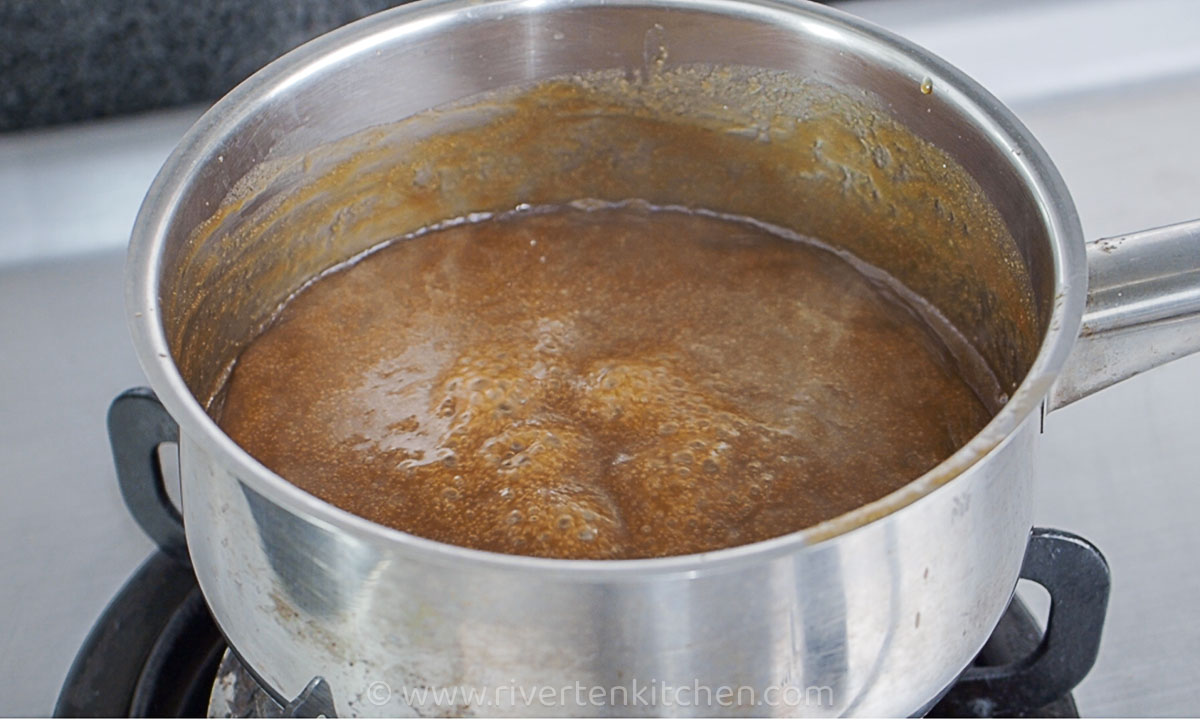
Place the coconut milk and dark muscovado sugar. Stir to combine then bring to a boil. Set the heat to low and cook until the sauce thickens to a syrupy caramel consistency. This will take about 20 to 30 minutes. Stir occasionally to prevent the sugar from sticking to the bottom of the pot.
Cooking Tip: After preparing this recipe multiple times, I’ve discovered that using a wide pan or skillet instead of a pot accelerates the thickening process of the caramel. The wide surface area of the pan allows for rapid evaporation of the liquid, resulting in a quicker thickening of the caramel.
2. Cook the Glutinous Rice (Malagkit)
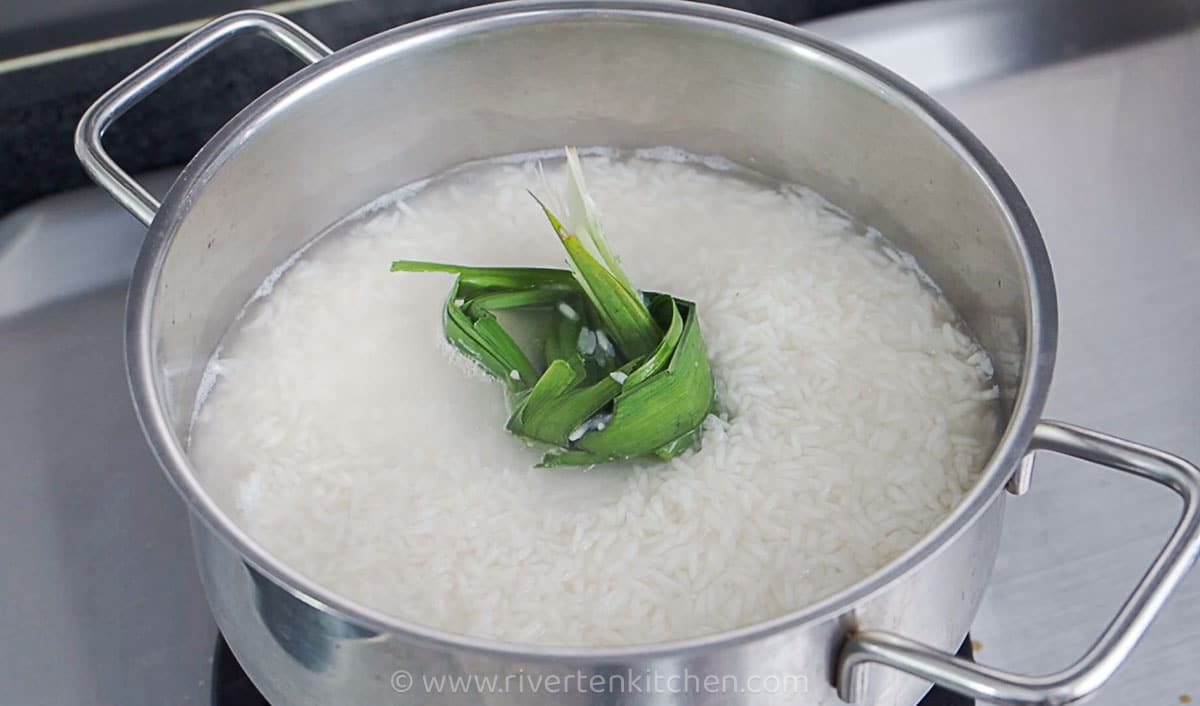
Rinse glutinous rice with water, once to remove any dirt. Drain well then place in a pot. Add water, salt, and fresh pandan leaf. Stir to combine. Bring to a boil with the lid on. Reduce the heat to low to prevent burning the rice.
The cooking time of glutinous rice is approximately 20 to 22 minutes. To check the doneness, gently press a grain of rice between your fingers or use a fork to check its texture. The rice should be tender and have a slightly sticky or chewy consistency without any raw or hard bits.
3. Sweeten the Sticky Glutinous Rice
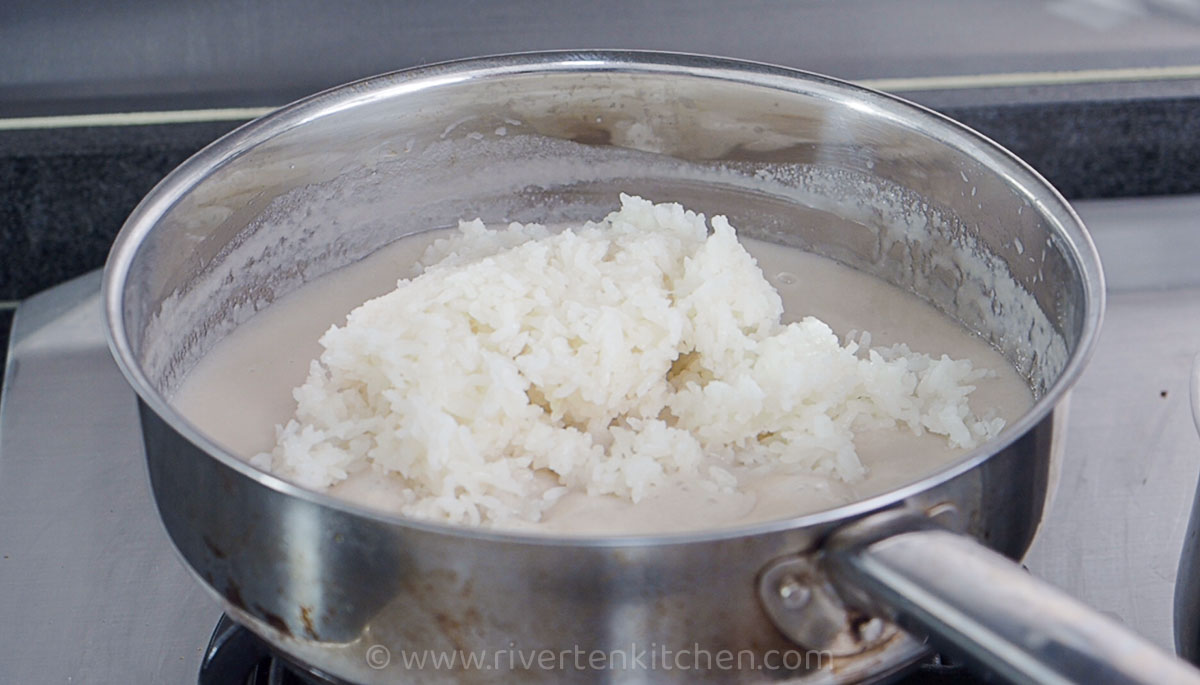
The next step involves adding flavor and sweetness to the cooked glutinous rice. To do this, place coconut milk and white sugar in a wide pan. Let it simmer until the sugar is completely dissolved. Add the cooked glutinous rice in 2 to 3 increments, stirring every addition.
Once the liquid is completely absorbed, keep stirring until the rice becomes sticky and stiff. Use two wooden spoons for easy stirring.
4. Assembly
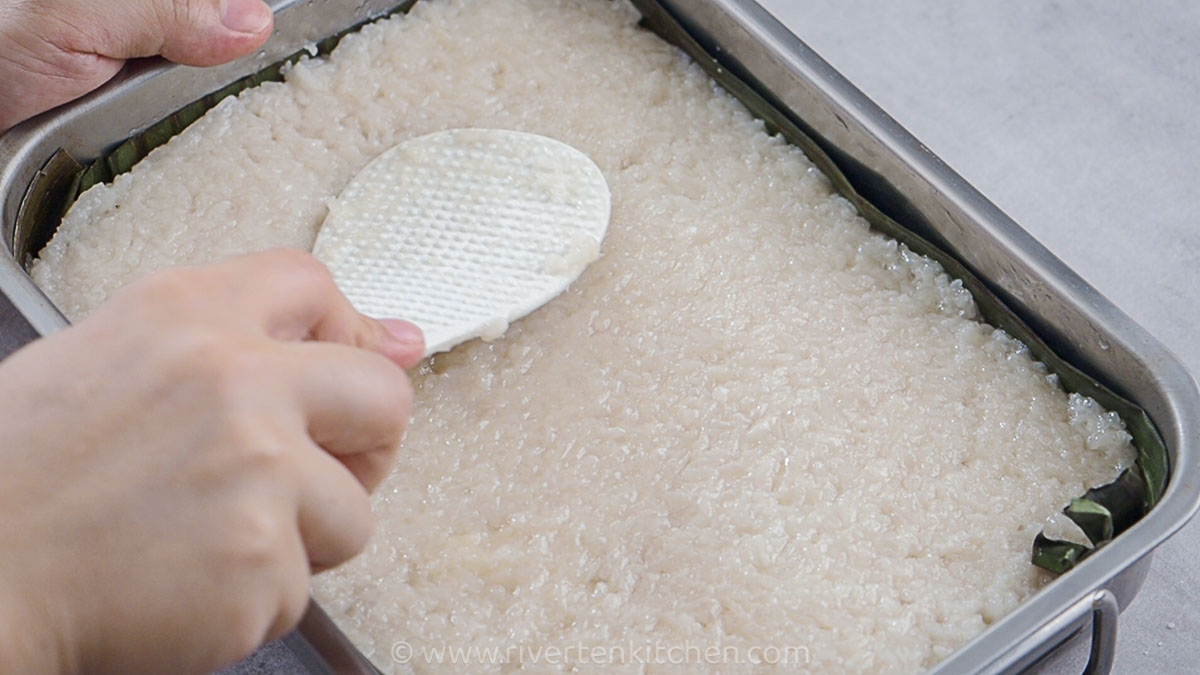
Flatten with a spatula or any flat spoon as evenly as possible.

Pour the thickened caramel coconut syrup (latik) on top of the sticky rice and spread evenly.
5. Bake in the Oven
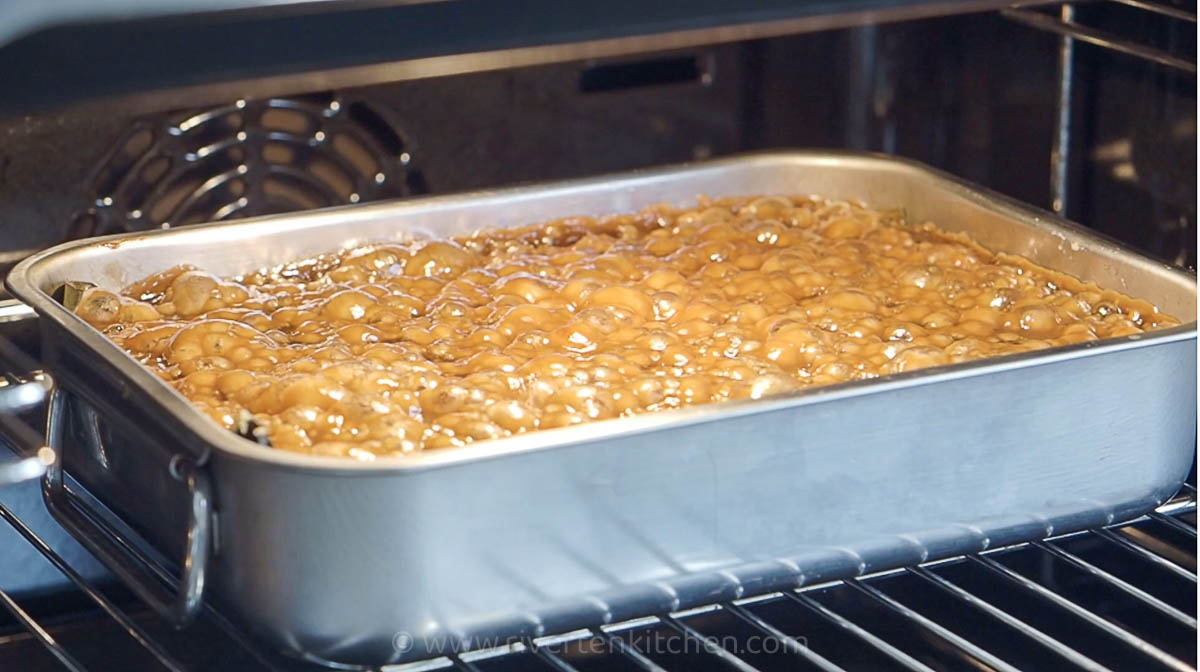
Preheat the oven to 400°C /400°F for 10 minutes. Lower temperature to 180°C/350F. Move the rice cake to the top rack and broil or bake using the upper heating element of your oven until the latik is caramelized.
This could take about 20 to 30 minutes longer depending on the type of oven. Watch carefully to avoid burning the sugar. Slightly open the door of the oven every now and then to release some heat. This ensures that the latik doesn’t burn.
More Cooking Tips
Making bibingka malagkit is not complicated. A little bit time-consuming, yes, but nothing you can’t handle.
Here are a few tips that will help the cooking process as smoothly as possible.
- Use a rice cooker to cook the glutinous rice. It’s convenient and so much easier. But if you want the “dukot” (burnt/ scorched) texture, use a regular stainless pot.
- Cook the latik syrup on low heat to achieve caramel consistency. This takes time. You’ll need patience and occasional stirring. Don’t try to increase the temperature as it could burn the sugar and make coconut milk produce too much oil.
- Line the baking pan with banana leaves – even if your bibingka is not cooked in charcoal or clay pot, it will have that familiar “bibingka kakanin” smell and flavor.
What to Serve with Bibingka Malagkit
I love anything bibingka with these Filipino dishes:
- Pansit Canton with the Most Delicious Sauce
- Chicken Sotanghon
- Pancit Bihon
- Palabok with Easy Sauce Recipe
Storage and Shelf life
Store leftovers in an airtight container and keep them refrigerated. It should last for 3 to 5 days if properly stored. To reheat, microwave for 30 to 40 seconds per piece.
Frequently Asked Questions
What is broiling?
Broiling is a cooking method that involves exposing food to direct heat from the top element of an oven. It is typically used to quickly cook or brown the top surface of food, giving it a crispy and caramelized texture.
If your oven doesn’t have a broiler, you can still achieve similar results by using the high temperature. Preheat your oven to its highest temperature and place the food on the highest rack closest to the heating element. Keep a close eye on the food as it cooks, as the intense heat may require adjustments to cooking times. You may need to rotate or flip the food to ensure even browning.
It is natural for the latik syrup to become watery because it contains coconut milk. The process is slower if the bibingka is broiled until the latik on top becomes stiff.
Use brown sugar. Note that the color of the latik will be lighter.
Broil it longer, 30 to 40 minutes in the oven. Yes, it will take that long. But watch it carefully so it doesn’t burn.
Try these next
Watch the Video
Love Filipino desserts? Try these…
- Custard Cake (Vanilla Flan Cake)
Coconut Mochi Donut Balls (Carioca/Cascaron) - Whole Eggs Leche Flan
- Ginataang Bilo-Bilo
- Buko Pandan
- Mango Sticky Rice
- Turon with Dulce de Leche
- Special Palitaw
- Mango Graham Cake
Bibingka Malagkit (Coconut Sticky Rice)
Equipment
Ingredients
Latik (coconut sugar syrup)
- 1 ½ cup coconut milk (note 1)
- ¾ cup dark muscovado sugar (packed, note 2)
- ¼ teaspoon salt
Malagkit (glutinous rice)
- 3 cups glutinous rice (note 3)
- 2 ½ cup water
- ¼ teaspoon salt
- 2 pcs pandan leaf (optional)
- 1 ½ cup coconut milk
- ½ cup white sugar (note 4)
Instructions
Make the latik syrup
- Place all the latik ingredients in a pot over medium heat. Bring to a boil. Set the heat to low and cook until sauce thickens to a syrupy caramel consistency. This will take about 20 to 30 minutes. Stir occasionally.1 1/2 cup coconut milk, 3/4 cup dark muscovado sugar, 1/4 teaspoon salt
Cook the malagkit (glutinous rice)
- Grease baking pan with oil, including the sides. Line with a banana leaf if using.
- Rinse glutinous rice with water. Drain well then place in a pot. Add the water, salt, and pandan leaf. Swirl to combine. Bring to a boil with the lid on. Reduce the heat to low and cook for 20 to 22 minutes until the rice is cooked through. Stir and scrape the sides occasionally. Remove and discard the pandan leaf.3 cups glutinous rice, 2 1/2 cup water, 1/4 teaspoon salt, 2 pcs pandan leaf
- Place coconut milk and white sugar in a wide pan. Let it simmer until sugar is completely dissolved. Add the cooked glutinous rice in 2 to 3 increments, stirring every addition. Use two wooden spoons if necessary.1 1/2 cup coconut milk, 1/2 cup white sugar
Assembly
- Once the liquid is completely absorbed and the mixture becomes stiff, pour the rice onto a baking pan.
- Flatten with a spatula. Pour the latik syrup on top of the sticky rice and spread evenly.
Baking (see note 6)
- Preheat the oven to 400°C /400°F for 10 minutes
- Lower temperature to 180°C/350°F. Switch the oven to upper heating mode. Move the rice cake to the top rack and bake until the latik is caramelized. This could take about 20 to 30 minutes, longer depending on the type of oven. For compact ovens cooking may be lesser due to higher temperatures.
- Slightly open the door of the oven every now and then to release some heat. This ensures that the latik doesn't burn.
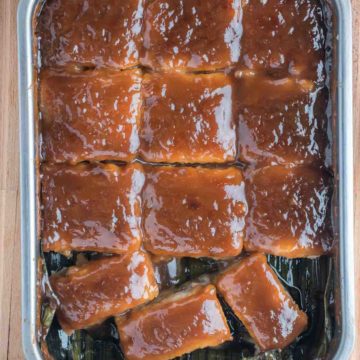
- Let it cool completely. Cut, serve, and enjoy!
Recipe Notes & Tips:
- Coconut milk for the latik syrup – coconut cream is recommended. Use that, if available.
- Muscovado sugar/ dark brown sugar – can be substituted with brown sugar. Note that latik syrup will be lighter in color. Measure tightly into the measuring cup.
- Glutinous rice – also known as sweet rice or sticky rice. You can find this in many Asian supermarkets and popular online stores.
- White Sugar – adjust up to 1/3 cup for less sweet sticky rice.
- Measurement: Use BAKING CUPS, not the cup that comes with the rice cooker.
- Baking – temperature amended to shorten the cooking time. An alternative cooking method is using your oven’s BROILER or using the BROIL mode. My oven allows me to select the temperature in broil mode. I’ve read that some ovens don’t have that option. It’s fine to use the pre-set temperature, just watch it carefully to avoid burning
Riverten Kitchen is a participant in the Amazon Services LLC Associates Program, an affiliate advertising program designed to provide a means for sites to earn advertising fees by advertising and linking to amazon.com.


my toppings turned out hard like candy. what could be the problem?
Hi Els, It could be a result of over baking. During baking, (step 3) slightly open the door of the oven every now and then to release some heat. This ensures that the latik doesn’t burn. If it appears that it has achieve the caramelization you prefer, you can take out the bibingka earlier than the stated baking time.
Could you share how long you baked it, and what size oven you used? I personally enjoy a slightly candy-like texture in my bibingka topping and would like to recreate that on my end. Your insights would be much appreciated!
– Mella
Thank you for the recipe. Unfortunately, I had no idea how long it would take to broil the finished product and so I was watching it every few minutes, I ended up broiling it for at least 20 minutes (I put it one shelf down from the top because otherwise it would have definitely burned). I could never tell when to take it out because it just kept bubbling and looking like liquid. I did take it out as I mentioned, but the crust is very hard, has to be cracked. It is nothing soft like your picture and like I had bibingka in the Philippines.
I figure that next time I will reduce the rice by 1/3 because that part is too thick and the latik syrup is too thin, so I am planning on increasing that by half.
A bit frustrated, I love bibingka, but mine so much doesn’t look like your picture. Sad!
the video says to broil the pawith the topping.
the written recipe says “ Preheat the oven to 180c/350f for 10 minutes.
Lower temperature to 160c/320f.
Move the rice cake to the top rack and broil until latik is caramelized.
This could take about 20 to 30 minutes (see note 4), longer depending on the type of oven.”
Broil is at 450-500 .. Are you using the term broil to mean use the uppermost rack so pan is close to heating element?
someone else noted the confusing instructions. Please clarify.
Yes that’s right, broil means using the upper heating element in your oven. My oven allows me to select the temperature in broil mode. I’ve read that some ovens don’t have that option. It’s fine to use the pre-set temperature, just watch it carefully to avoid it from burning.
Hope this helps.
Mella
Thank you for the yummy recipe.
By the way, there seems to be a discrepancy in the written recipe instructions section regarding water measurements for the glutinous rice. The listed ingredients part for water is accurate, however, in the recipe steps, the water measurements show 2 1/2 cups across all three portion sizes.
Hi Monika, Glad you enjoyed this bibingka recipe. The instructions unfortunately won’t update when you adjust the portion size. It is a system limitation. I’ve moved the ingredients below the instructions to avoid confusion.
Thanks for letting me know.
Mella
This recipe turned out so flipping delicious ! Like, it shouldn’t be this easy to make something so sinfully amazing lol. I made two pans of these & between the three of us we ate them both in under two days… I will absolutely making this again & I’m sure many more recipes from this obviously talented creator. Thank you, I am so grateful you were so kind as to show me a new favorite recipe!
Thank you! This is one of my favorite Filipino food. Glad you enjoyed it too.
– Mella
Delicious malagkit bibingka. For the topping, I just used a latik bottle. Softened it until the consistency is spreadable.
Thanks for sharing your bibingka cooked in a rice cooker!
Encountered an obstacle regarding decrease temperature bake to 320f and broiling latik to expected result. Oven will not simultaneously bake at 320 and broil. It is either or. So I bake for 10 minutes and broil same time and pendulum that way. But, thank you for your sharing recipe. Never have I ever made bibingka especially this way “authentically” Filipino. Thank you.
Looks easy but what is the ratio of sugar to coconut milk ingredients?
So good and so easy to make. Thanks for simplifying the recipe! Now I don’t have to wait for my sis-in-law to make it for parties… especially with sheltering in place here in California!
You’re welcome, Jules! Merry Christmas!
– Mella
I like your picture and video presentations. Unlike other Filipino recipe videos that are long and draggy, yours are short but sharp and easy to follow. Your pictures are lean and clean and showing an uncluttered kitchen. Congratulations on your website!
This comment just made my day. Thank you, Emily! You pretty much summed up my style.
– Mella
Your recipe was laid out simply and easy to follow.
I love the way my bibingka turned out. I will surely check out your site for more recipes.
Thank you, Karen for the wonderful feedback. I’m glad you enjoyed my bibingka recipe.
One of my fave desert. I’ll add it to my list. Ngayon pa lang natatakam na ako.
Me too! Making this brought a lot of memories growing up in the province. Enjoy!
– Mella
Hi Mella! I was just wondering if you used the “rice” measuring cup or the actual measuring cup ?
I used the actual measuring cup. The one I used for cakes and bread.