
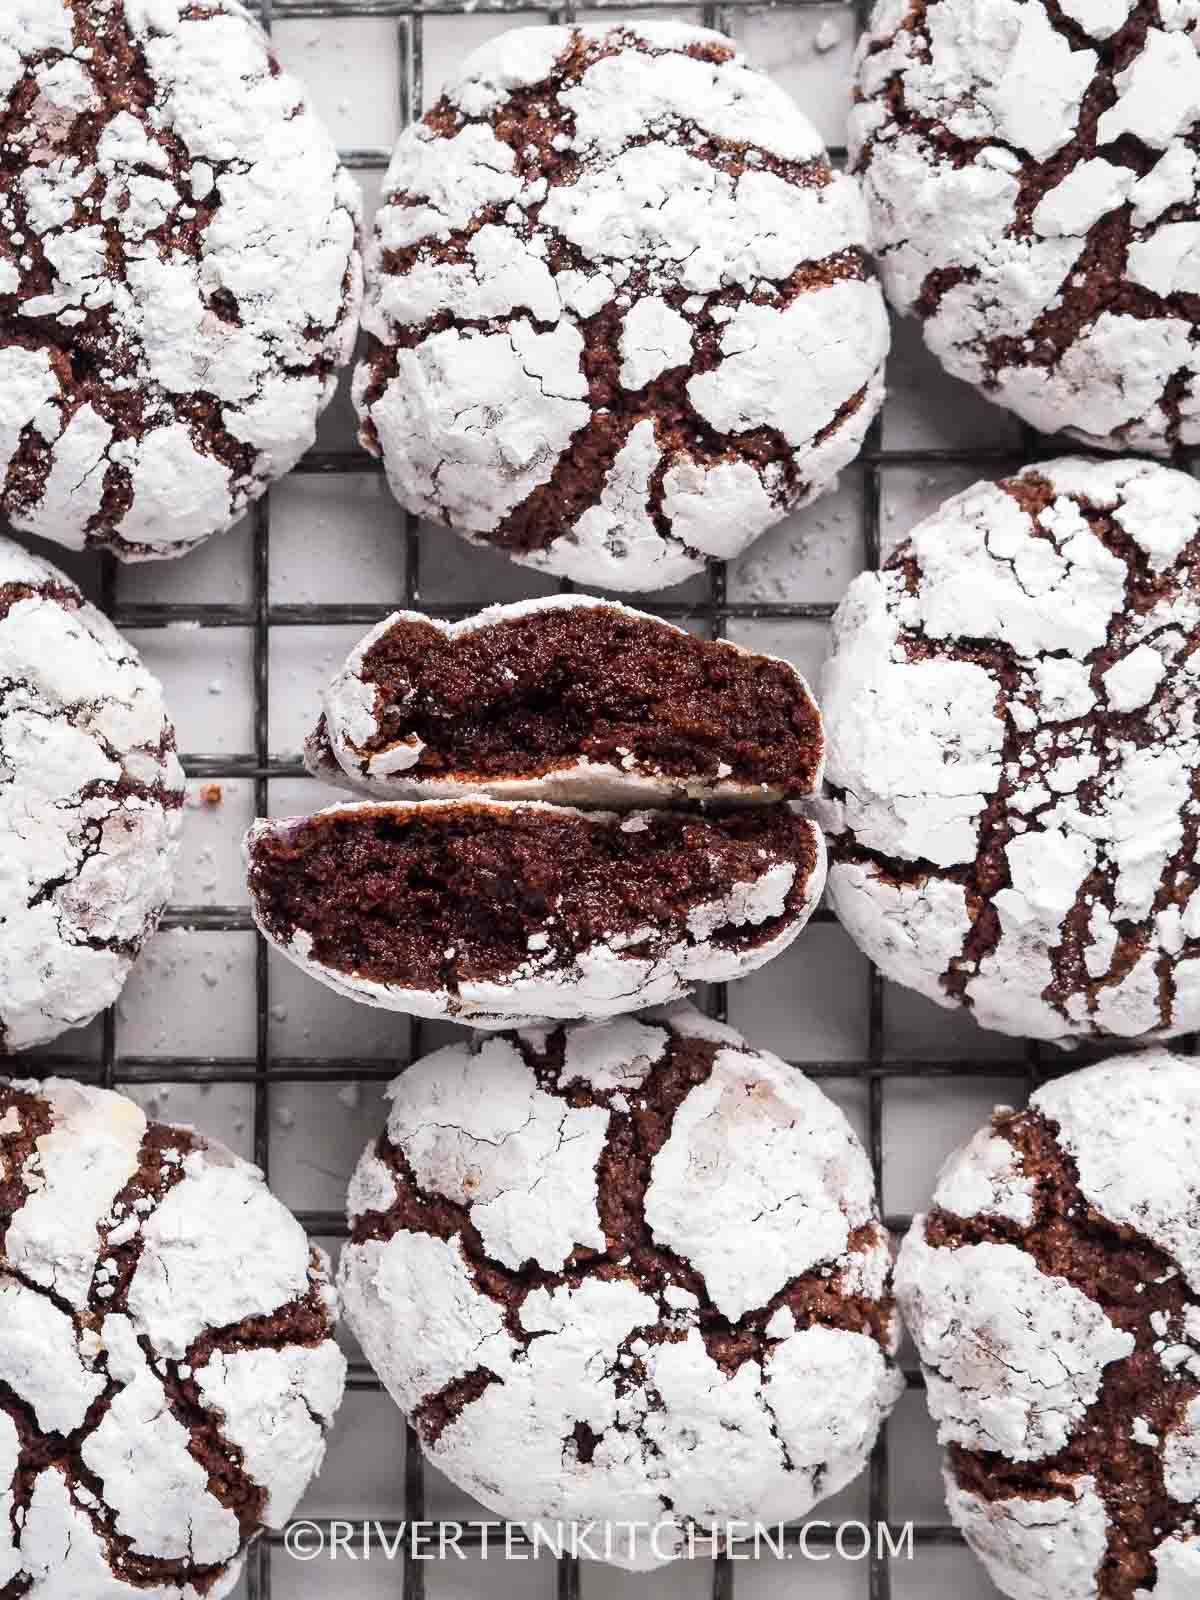
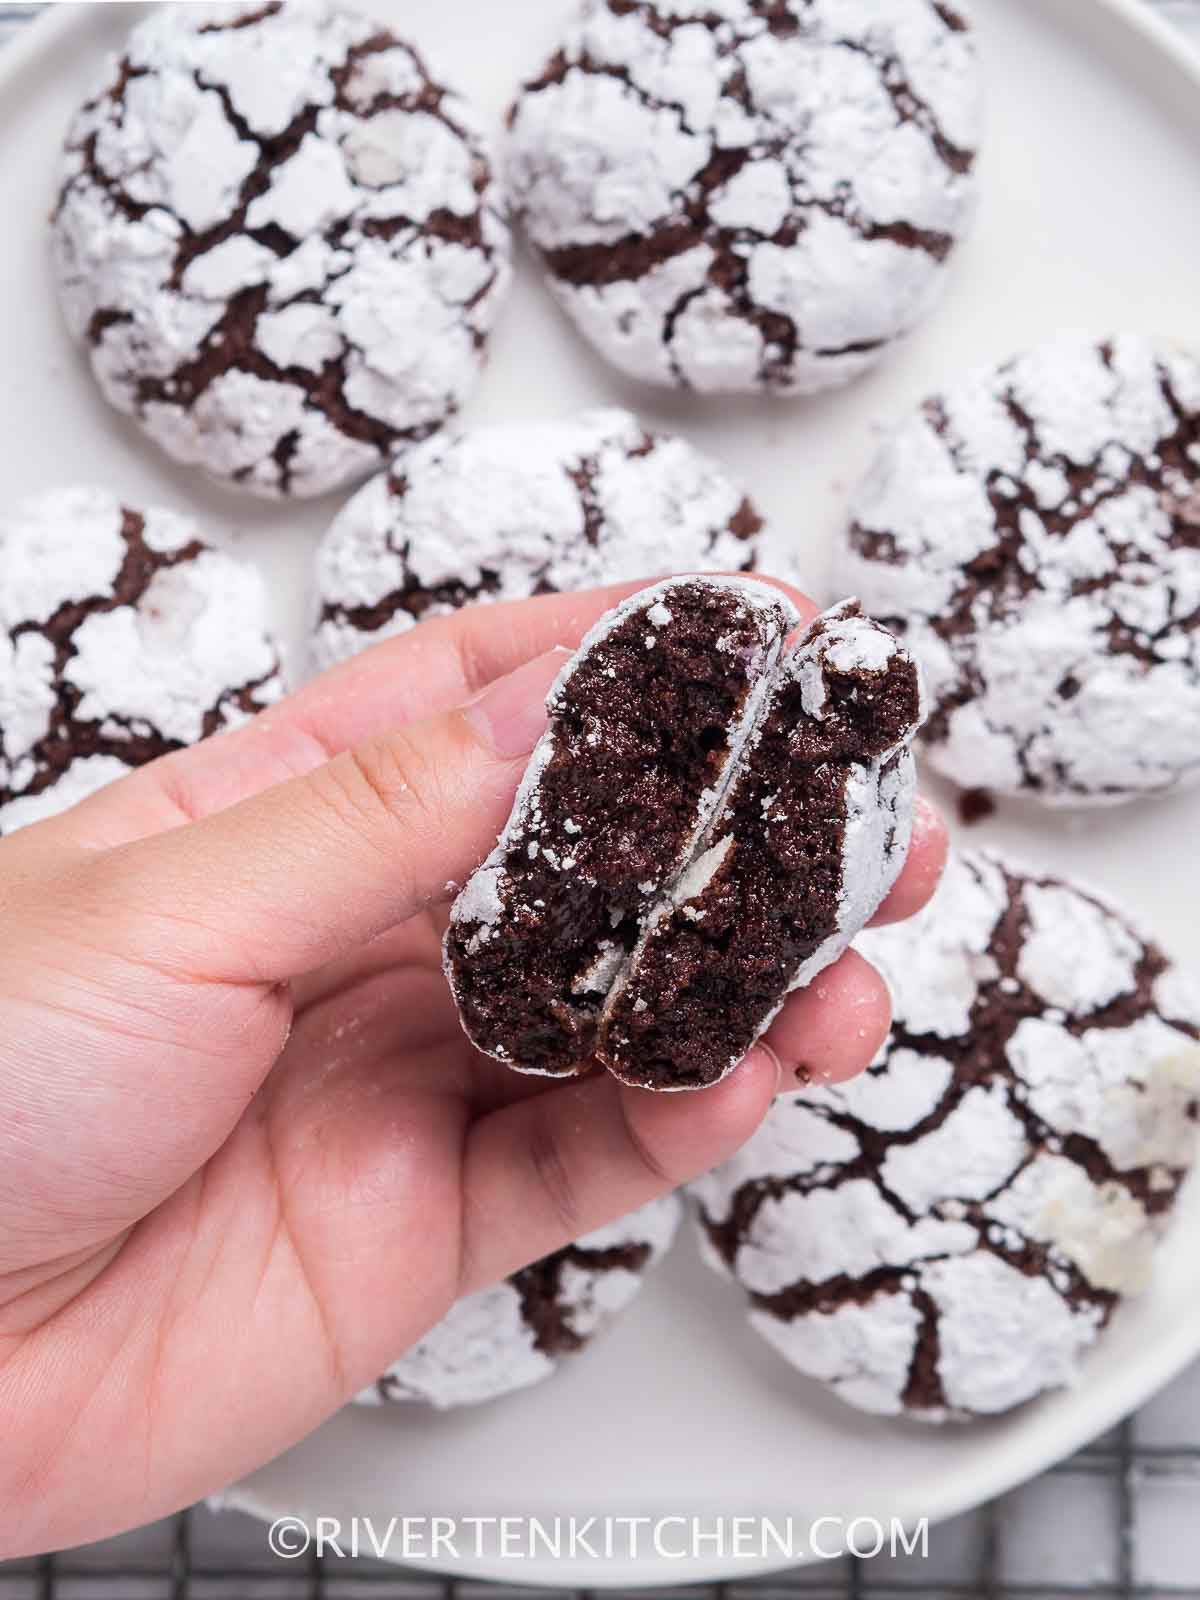
Chocolate crinkle! This is your ultimate guide to making your favorite holiday cookies. Soft and fudgy in the middle with a hint of crisp on the outside. Easy and delightful to make. No electric mixer is needed!
Why you’ll love this recipe
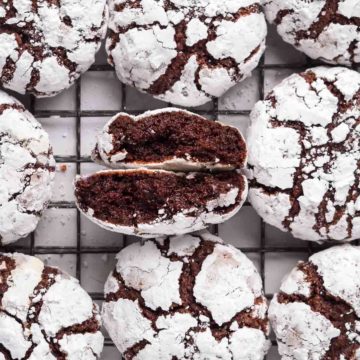
- Soft, fudgy, and moist in the middle with a hint of crisp on the outside. It’s like a brownie, in cookie form!
- Rich in chocolate flavor but not overly sweet and that is what makes it so delicious!
- One of the easiest cookies you’ll ever make. No complicated steps, NO MIXER needed!
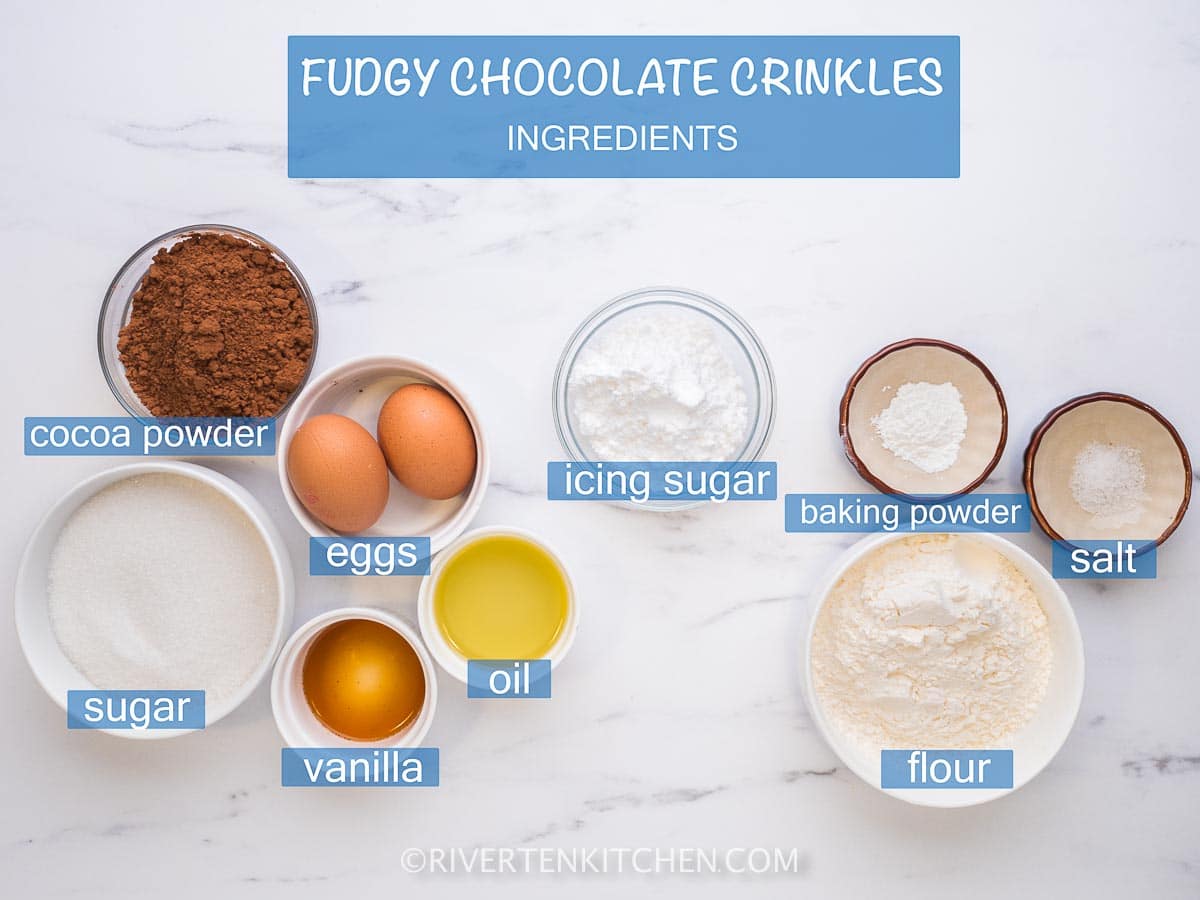
Ingredients
Here’s what you need to make the best chocolate crinkle cookies:
A few important things to note for some of the ingredients:
- Natural Cocoa Powder (unsweetened) – use the best quality you can find. It should not have ingredients other than cocoa powder. This is one of the secrets to making the best-tasting chocolate crinkles.
- White Sugar – you can use caster sugar or superfine granulated sugar. Avoid using coarse sugar as it doesn’t dissolve easily.
- Eggs – you will need two large eggs at room temperature. Using small eggs will impact the texture of the cookies.
- Vegetable oil – canola or any neutral-tasting vegetable oil will do.
- Vanilla Extract – the better quality, the better flavor.
- All-purpose flour – is best for chocolate crinkle cookies. I don’t recommend substituting it with cake flour or bread flour.
- Baking Powder – make sure it’s still active and not past its due date. Expired baking powder causes cookies not to properly rise.
TIP: To test the freshness, pour 1/4 cup boiling water over 1/2 teaspoon baking powder. If it foams then it’s good. Otherwise, time to replace it.
See the recipe card for quantities.
How to Make Chocolate Crinkle Cookies
Here are my top tips for making fudgy, crinkly chocolate crinkle cookies:
Part 1: Measure the ingredients
Start off by properly measuring all the ingredients, especially the flour and cocoa powder. The best and most accurate way is using a kitchen scale. If that’s not available, use the scoop-and-level method:
- Fluff the flour/cocoa powder a few times to loosen it.
- Using a large spoon, scoop it into the measuring cup until it’s full. Do not tap nor pack the cup as that will cause the flour to sink at the bottom. This can add too much flour and will cause the cookie to have a dry texture.
- Finally, level off the top of the cup with the handle of the spoon.
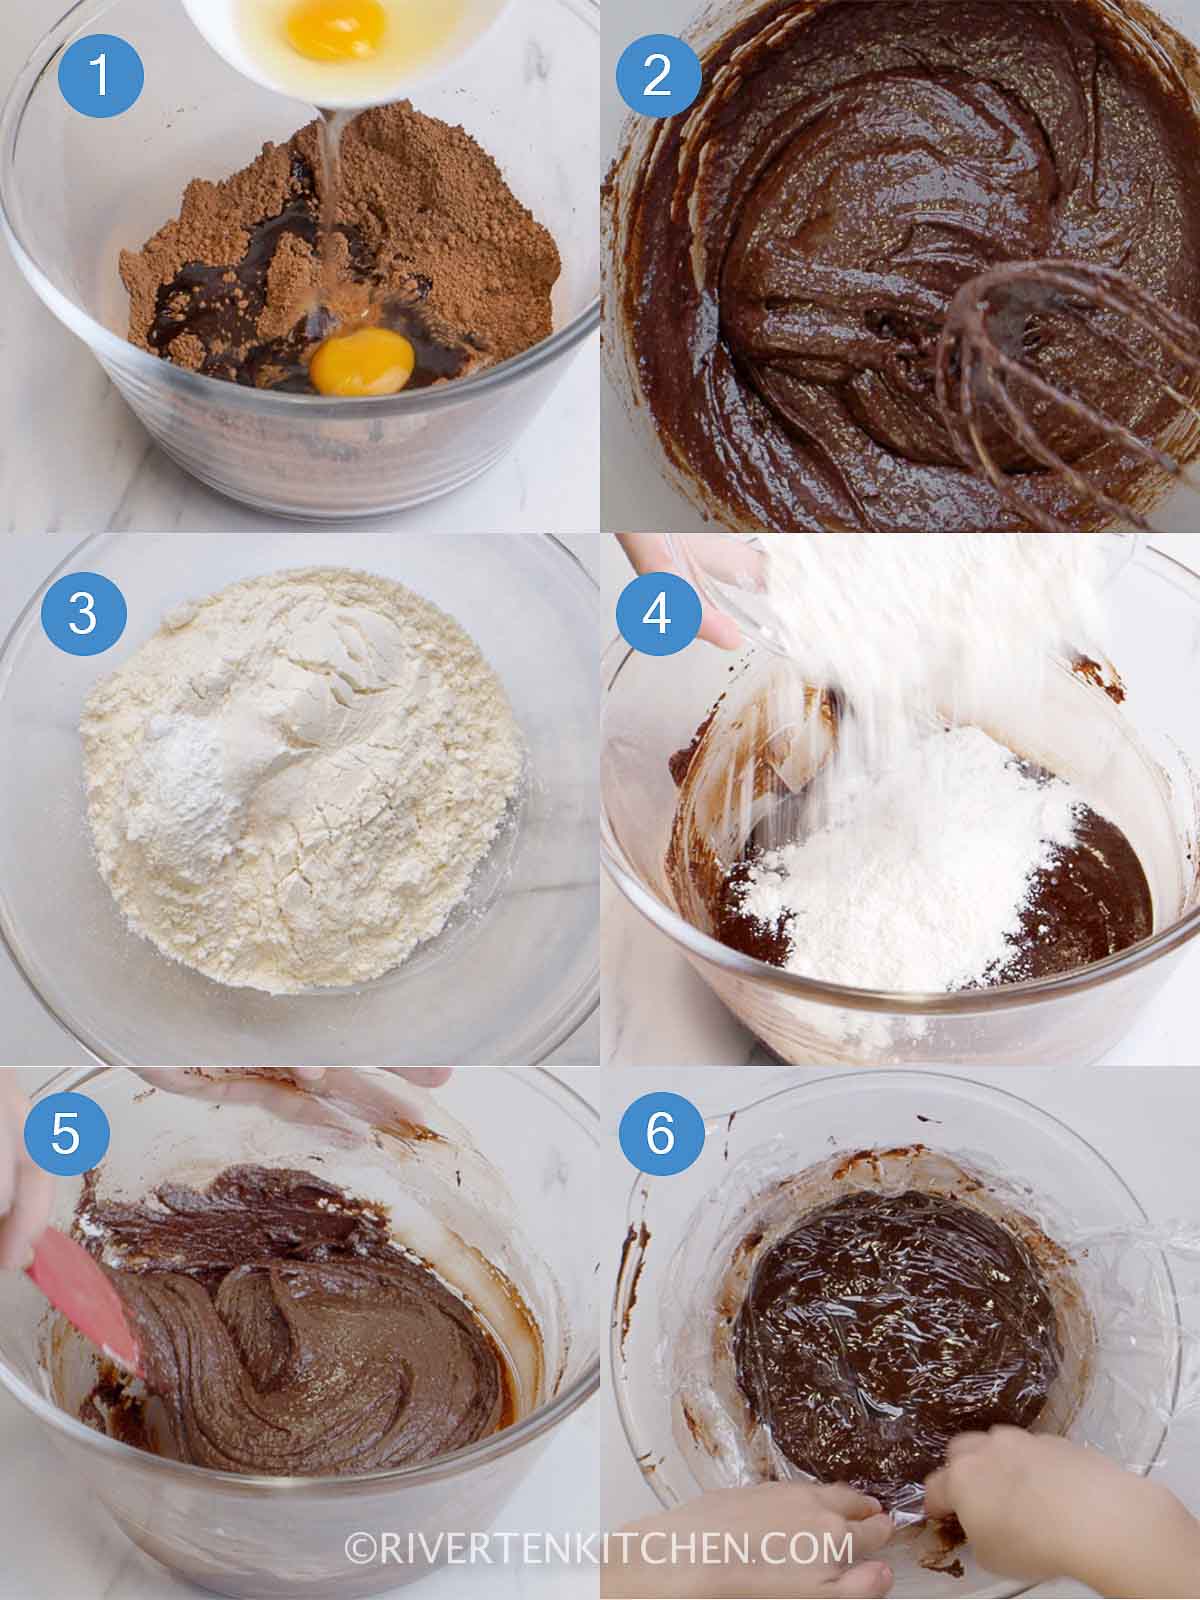
Part 2: Make the cookie dough
Here’s how to make the dough. You can do this by hand with a whisk, a hand mixer, or a stand mixer.
A few tips:
- Make sure sugar is completely dissolved before adding in the dry ingredients.
- As the dough is sticky, use a rubber spatula to stir the ingredients together.
- Do not overmix–once you don’t see any traces of flour. Stop mixing!
Do I need to refrigerate the cookie dough?
For easy shaping, I recommend refrigerating the dough for a minimum of 2 hours, 30-45 minutes if using the freezer, or overnight if you’re making ahead.
If you don’t like waiting, you can shape it right away (yes, I’ve tried it). It will be a bit tricky but it can work (see FAQ below).
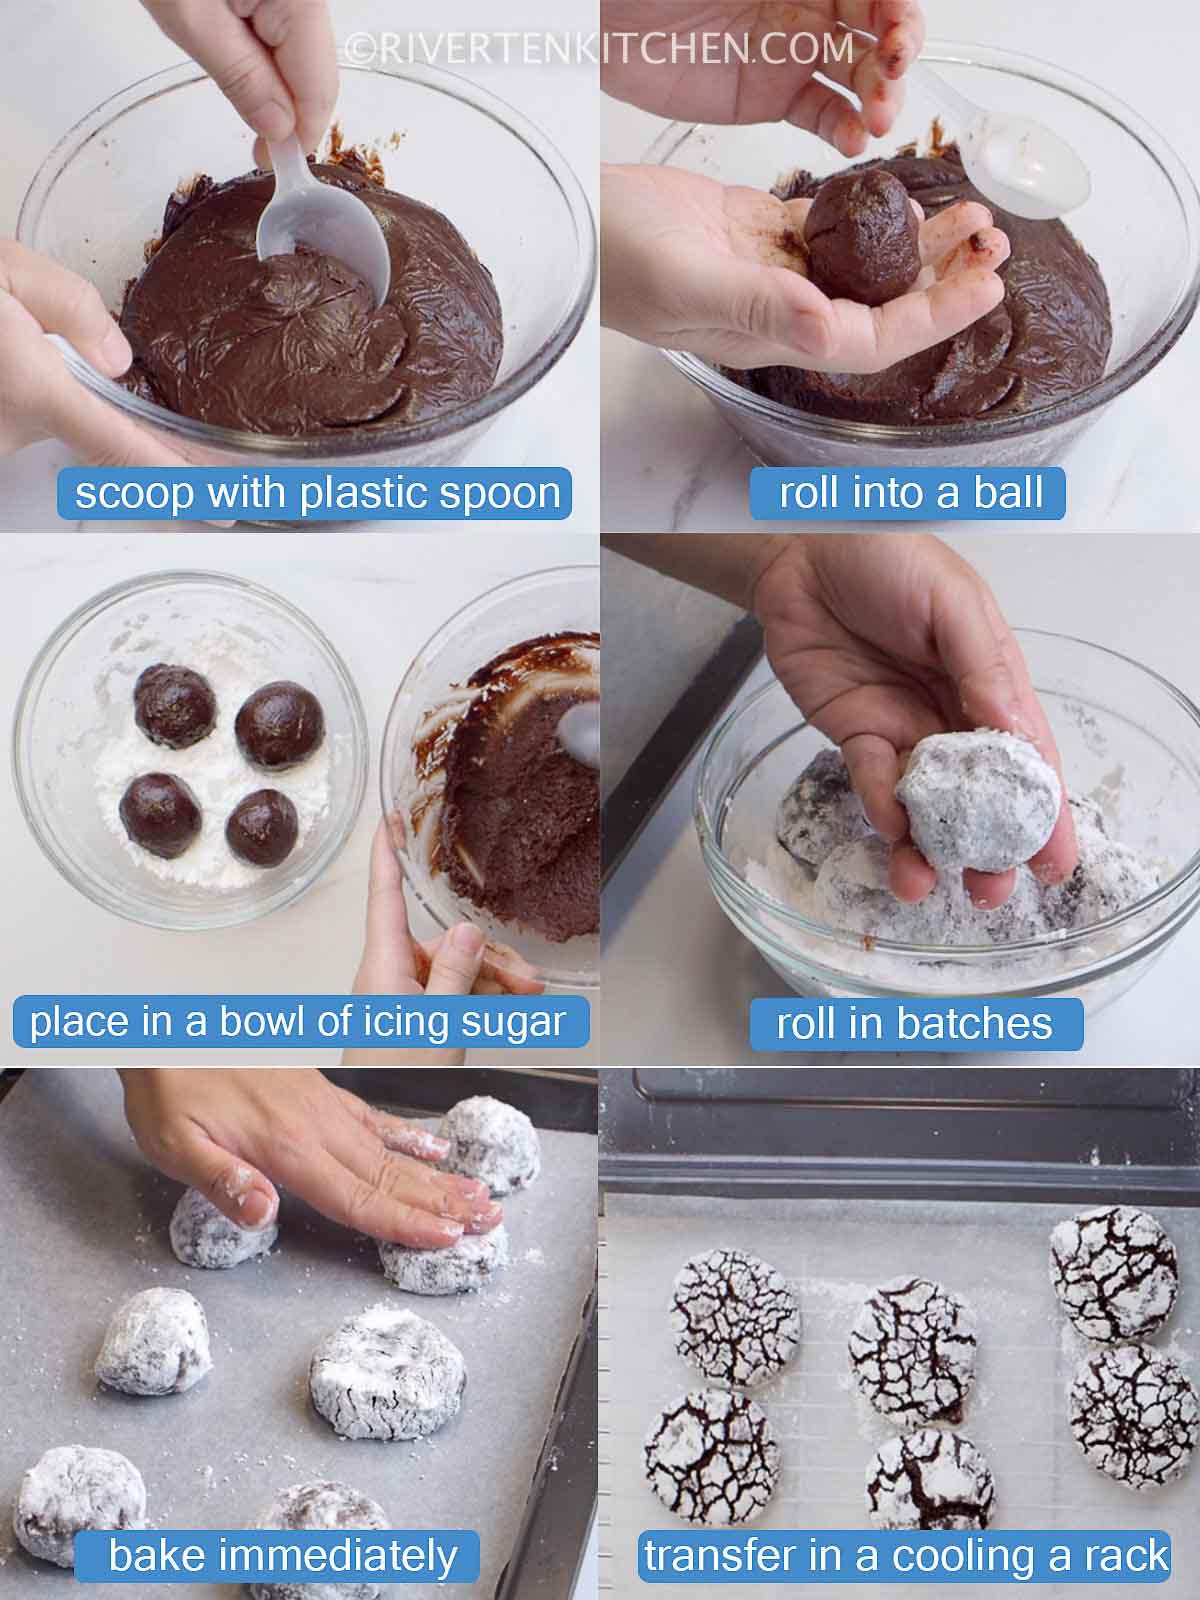
Part 3: Shape and roll
As you can see, the dough is firm enough to be shaped after refrigeration.
PRO TIP: When you’re ready to shape, pre-heat the oven even before removing the dough from the refrigerator. This will ensure that it is ready with the right temperature by the time you’re done shaping. My oven takes 20 minutes to get ready, so time yours accordingly.
- Use a plastic measuring spoon to scoop the dough if available. The dough doesn’t stick much to it compared to a regular metallic spoon.
- Coat your hands with powdered sugar to prevent the cookie dough from sticking.
- Heavily roll the cookie dough to the icing sugar. Do this in batches, not individually.
- Quickly transfer the rolled dough to a baking sheet.
Make Chunky or Thick Cookies
To make thick cookies (not flat), lightly press the balls to flatten. This will help the cookie spread out during baking.
To make it chunky (slightly bulky at the top), do not flatten. Bake the rolled dough balls as it is.
Part 4: Baking the Cookies
- Immediately bake the cookies in the preheated oven. Use the middle rack.
- Do not overbake or the cookie will become dry.
- Baking time for small cookies should be about 9 minutes while big cookies take about 11 minutes.
- Only bake one cookie sheet at a time. Top heat is needed to enable the cookie to crinkle.
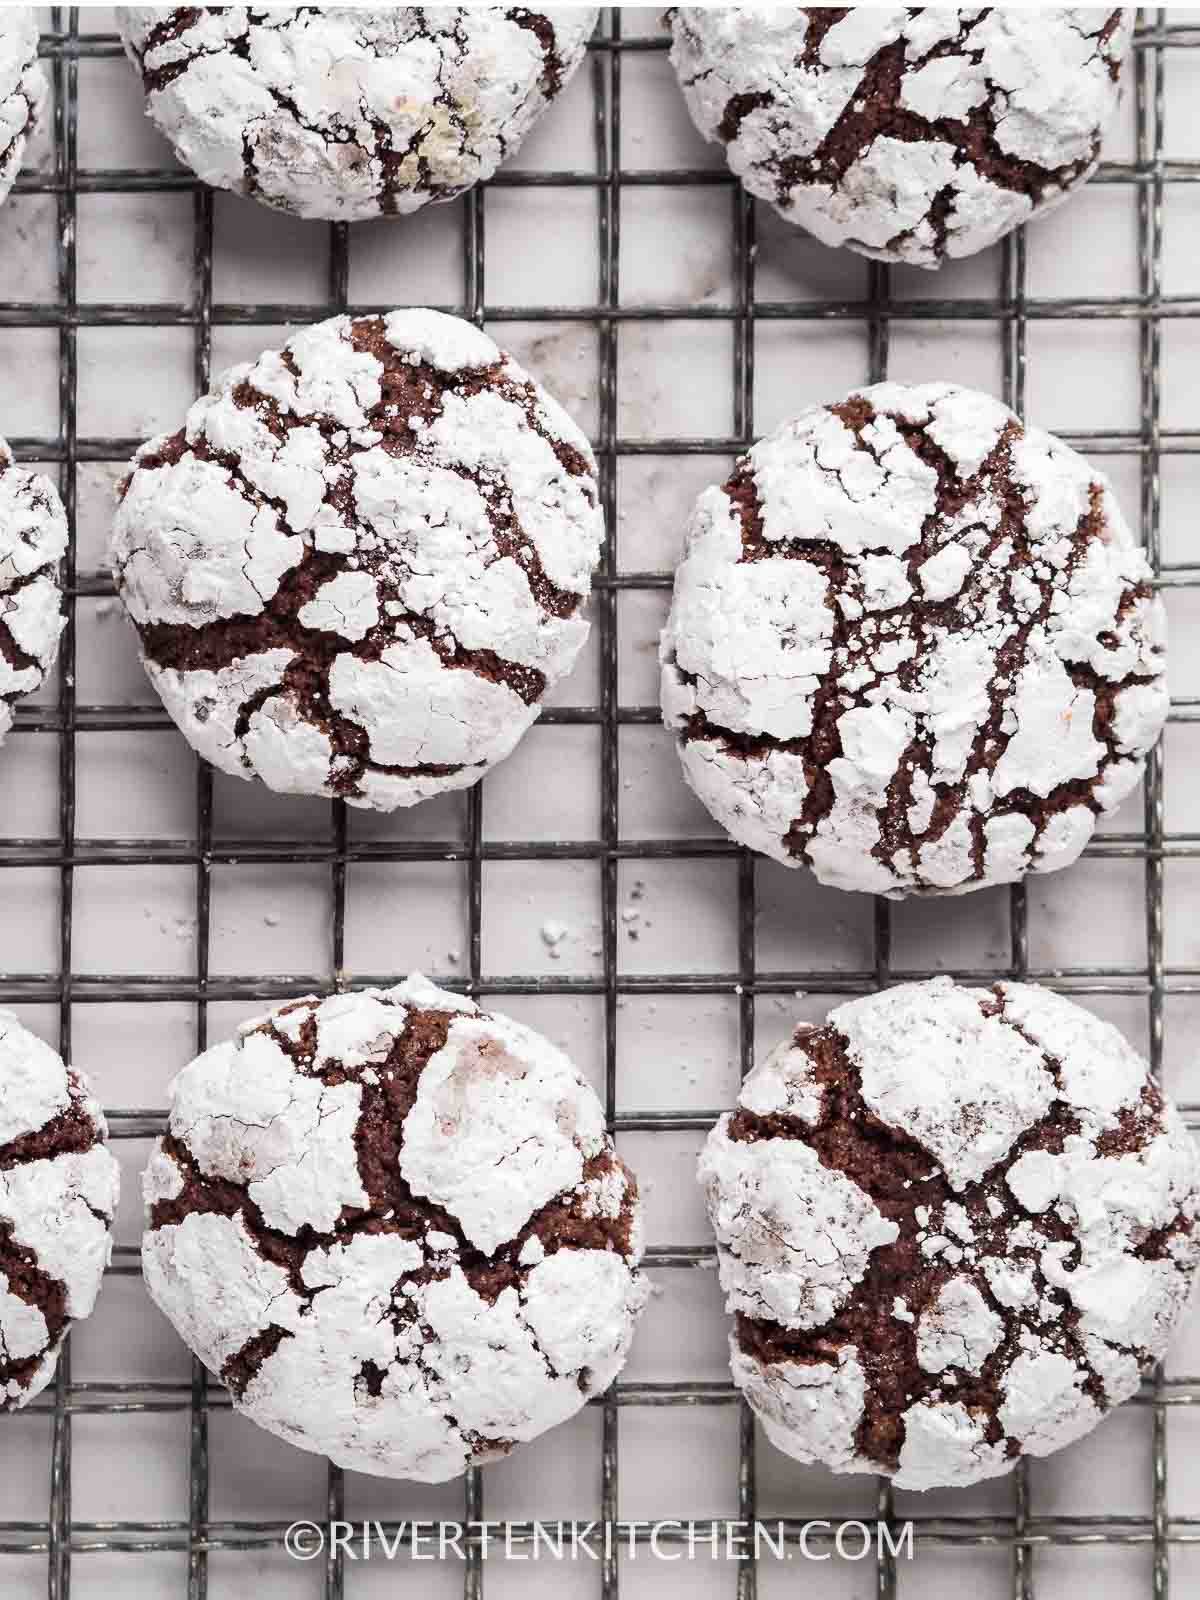
How to get that crinkle
Do not let the sugared dough sit on the counter for too long. If the icing sugar melts and gets absorbed by the dough the chocolate cookie will not crinkle. If this happens, roll in powdered sugar once again before baking.
Roll in granulated sugar – totally optional but this will help the powdered sugar stick to the cookie and will make it last longer. Note that this will give the cookie a pleasantly crunchy texture and of course slightly sweeter.
Variations
- Make it EXTRA CHOCOLATEY – add 1/2 cup semi-sweet chocolate chips or chopped white chocolate.
- Add 1 to 2 teaspoons of peppermint extract in addition to the vanilla extract for another layer of flavor.
Shelf-life and Storage
For the baked cookies: Store in an air-tight container. It should last for up to 5 days at room temperature. No need to refrigerate.
Freezing the Dough
For the dough (unrolled and uncoated), it should last in the refrigerator for up to 5 days and for up to 1 to 2 months in the freezer. Thaw overnight in the refrigerator before using. When ready to bake, roll into balls and coat with icing/powdered sugar.
Top tip: Making a big batch?
Use a stand or hand mixer. This will make it easier to stir the cookie dough.
Work in batches. Keep the dough refrigerated and take out only enough to work with. The dough easily gets warm and sticky at room temperature.
Frequently asked questions
Generously cover the dough balls in powdered sugar. Don’t shake off the excess. Do this in batches instead of individually–e.g. by 6 or 8 depending on how much you can put on your baking sheet. Bake them right away. Don’t leave it on the counter for too long or the sugar will melt.
Dry chocolate crinkle cookies can be caused by three things: using too much flour, over-baking, and over-mixing.
You can substitute oil with melted butter. However, the shelf-life of the cookie will become shorter. Personally, I prefer using vegetable oil for chocolate crinkles over butter. I find the flavor of the cookie more “chocolatey” with oil.
Personally tested this and the cookie became dry in the middle. I don’t have a scientific or technical explanation for this but I’m sticking to white sugar for now. when I get a better result with brown sugar, I will update this post
Personally tested this and the cookie became dry in the middle. I don’t have a scientific or technical explanation for this but I’m sticking to white sugar for now. when I get a better result with brown sugar, I will update this post
Use a non-stick spoon or plastic spoon to scoop the dough then use a spatula to scrape out the dough from the spoon directly onto the bowl of icing sugar.
Roll the dough to the icing sugar using the tip of the spatula. You should be able to touch it with your hand once it’s completely covered with powdered sugar.
After numerous tests, I find that the level 2 rack gives the cookies a moist and fudgy texture i.e. NOT DRY.
Watch how to make it
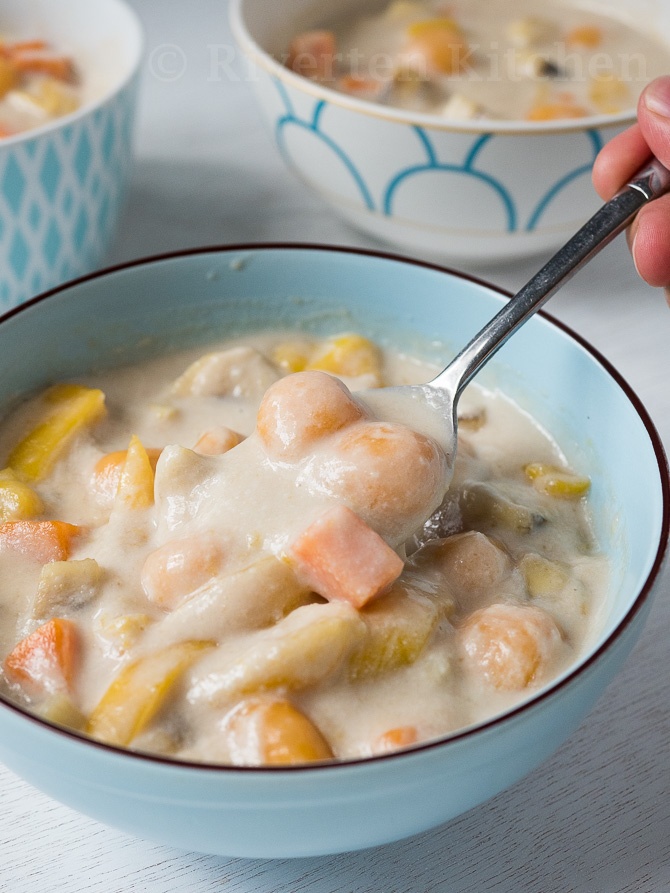
You might like these too
Chocolate Crinkle Cookies (Soft and Fudgy)
Ingredients
- ¾ cup unsweetened natural cocoa powder
- 1 cup white sugar (granulated or caster)
- ¼ cup vegetable oil (I used canola)
- 2 large eggs (room temperature)
- 2 teaspoon vanilla extract
- 1 cup all-purpose flour
- 1 teaspoon baking powder
- ½ teaspoon salt
- ¼ cup confectioner's sugar (add more as needed, see note 1)
Instructions
Make the dough
- Combine cocoa powder, sugar, oil, eggs, and vanilla. Whisk well until sugar is dissolved.
- In another bowl, combine flour, salt, and baking powder. Whisk to combine.
- Add dry ingredients to wet ingredients. Stir with a spatula until no traces of flour is visible. Dough will be sticky. DO NOT OVERMIX.
- Press a plastic wrap over the top and sides of the dough. Chill for 2 hours or freeze for 30-45 minutes. This will make the dough less sticky during shaping.
Baking and rolling
- Pre-heat oven to 177c/ 350f for 20mins. Line baking sheet with parchment paper.
- Meanwhile, sift powdered sugar in a fine-mesh. Place in a tray or bowl.
- Scoop the cookie dough and shape it into balls–1 tablespoon for small cookies 1.5 to 2 tablespoons for large cookies. Do this in batches while keeping the rest of the dough refrigerated.
- Place the balls in the bowl of icing sugar. Heavily roll each piece until fully coated. Immediately arrange in the baking sheet 3 inches apart. For thick cookies, press down to LIGHTLY to flatten (see video). To make it chunky (slightly bulky at the top), do not flatten. Bake the rolled dough balls as it is.
- Place in the oven, middle rack. Bake for 10 minutes for small-size cookies and 12-13 minutes for large cookies. Note: Only bake one batch of cookies at a time. Top heat is needed to enable the cookie to crack.
- Remove from the oven. Do not overbake. Transfer to a cooling rack after 1 minute. Cookies will be soft while still hot but will set and firm up once completely cooled.
Recipe Notes & Tips:
- When you’re ready to shape, pre-heat the oven even before removing the dough from the refrigerator. This will ensure that it is ready with the right temperature by the time you’re done shaping.
- Double or triple-coat the dough with icing sugar for a nicer crack effect.
- Do not let the sugared dough sit on the counter for too long. If the icing sugar dissolves and gets absorbed by the dough the chocolate cookie will not crinkle. If this happens, roll in powdered sugar once again before baking.
- Add 1/2 cup semi-sweet chocolate chips
- For the baked cookies: Store in an air-tight container. It should last for up to 5 days at room temperature. No need to refrigerate.
- For the dough (unrolled and uncoated), it should last in the refrigerator for up to 5 days and for up to 1 to 2 months in the freezer. Thaw overnight in the refrigerator before using. When ready to bake, roll into balls and coat with icing/powdered sugar.
Riverten Kitchen is a participant in the Amazon Services LLC Associates Program, an affiliate advertising program designed to provide a means for sites to earn advertising fees by advertising and linking to amazon.com
Glad I found this recipe. My first try was a success! The step-by-step photos were really helpful. Excited to make this for my friends this Christmas.