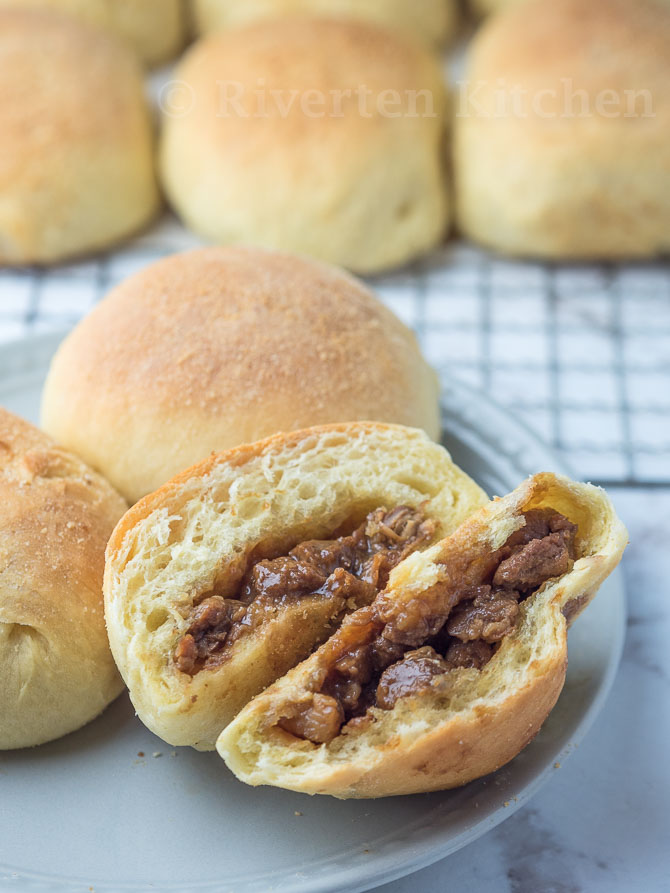
Learn how to make baked pork buns in your own kitchen. These baked buns are light, soft and tender. And the pork filling is sweet-salty and packed with Asian flavors. Lay it on bread crumbs to turn it into Filipino asado bread roll or brush it with egg wash to make it an Asian bakery-style bun.

How to make Baked Pork buns the easy way
Ahh…I’ve dreamt of making this for the longest longest time! Finally made one my favorite Asian buns at home. And I’m so excited to share it with you.
Making pork-filled baked buns may look daunting but, don’t worry! I’ll show you how to make the whole experience easier and more enjoyable!
Splitting the effort into two or three parts is the key to making baked buns less tedious. Here’s how it goes down:
Part 1
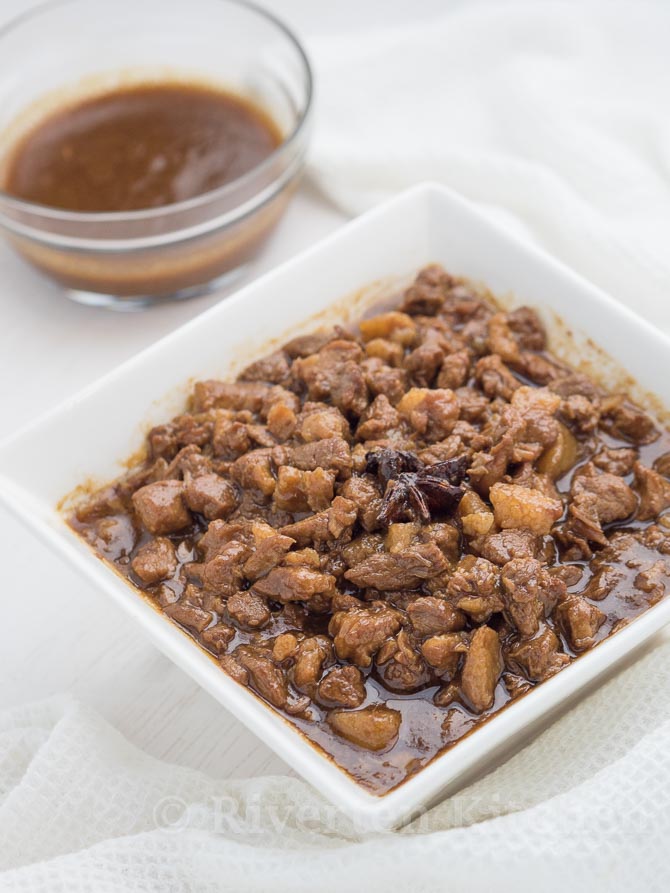
Make the pork filling
- Follow my easy pork bun filling recipe. It takes more than 1 hour to make it, start to finish, but the effort is only around 10 minutes! Stir it every now and then until the pork is succulently tender.
- Once the pork is done, let it cool. Transfer to an airtight container then put in the fridge to set for 6 to 24 hours. This will make the mixture compact and easier to fill into the dough.
Make the dough
- You can make this on the same day as the pork filling. After kneading, place in an oiled bowl then cover with a plastic wrap and seal the edges. The dough will slowly rise and double in size overnight.
- On the day of baking, remove from the fridge. Let it rest on room temperature for 30-40mins. Punch it down and knead by hand a few times before shaping/rolling. This will help lessen the “yeasty” smell of the bread.
Part 2
Make the pork buns
- Start by dividing the dough into 18-20 balls, around 50g each. Form into a smooth ball and place on a tray. Cover with a towel to prevent the dough from drying.
- Using a small rolling pin, lightly flatten it into a disc making sure that the center is thicker than the edges. Roll around the edges so it’s thinner (NOT FLAT!) than the center.
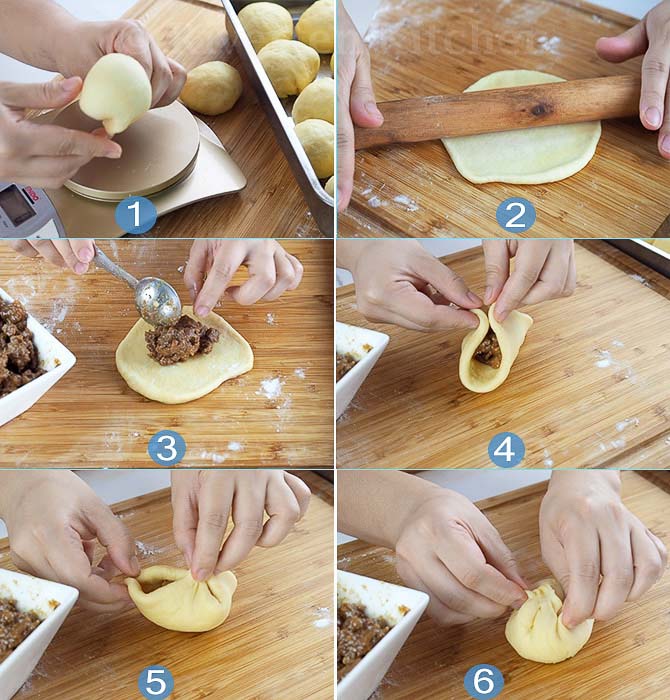
- Place about a heaping tablespoon of filling in the center of the dough.
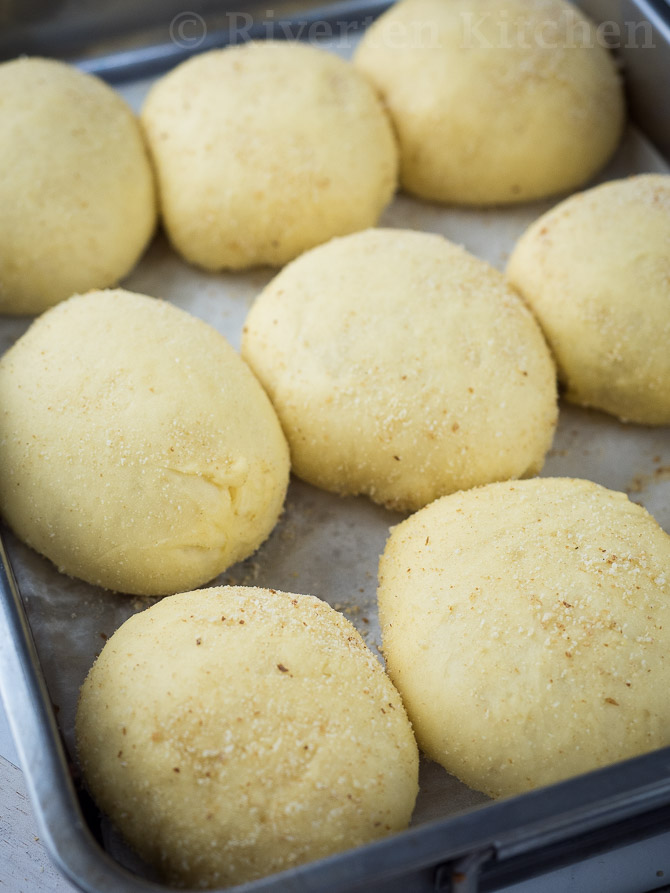
- Gather the edges and seal the bun tightly. Lay it in the bread crumbs. Shake off excess then place seal side down in the baking tray greased or lined with a parchment paper.
- Make sure that the dough is arranged two inches apart. Cover with a towel or cloth and let it rise for 40mins to 1 hour.
- Bake in a pre-heated oven at 180c/350f, for 18 to 20 minutes until the top turns light brown.
Variation: Brush the surface of the dough with egg wash instead of laying it on bread crumbs. Do this after the second rise, just before baking.
Check out this article to learn more about the different types of egg wash.

A FEW MORE TIPS BEFORE YOU START BAKING
- Use a stand mixer with a dough hook to make the kneading process super easy.
- The pork filling can last up to 3 to 5 days in the fridge and 2 weeks in the freezer. So you can make it ahead of time, a few days before making the dough.
- My pandesal recipe includes step-by-step pictures and a video guide will walk you through the whole process of making, dividing and shaping the dough.
- Remember to lightly flatten, don’t press too hard otherwise the dough will be too thin.
- Don’t overfill! It will be hard to close the dough and filling might ooze out of the bread during baking.
- A refrigerated dough (1st rise) is best to use within 48 hours.
- Bread flour – substitute with all-purpose flour if not available. Replaced in the same amount as mentioned in the recipe. Note that the bun will be less chewy without bread flour. It will still be tender, don’t worry.
Serve and Storage
These baked buns are best when they are still warm. I don’t recommend eating them fresh out of the oven because the filling is very hot and can burn your tongue.
You can store leftover buns in the fridge for 3 days. Although, I doubt you will need to store them for that long because they’ll disappear within the blink of an eye!
Re-heat in a mini-oven toaster for 1 to 2 minutes over low heat or 30 seconds in a microwave.
Watch the video on how to make Baked Pork Buns
Love bread? Try these next!
- Filipino Pan de Coco
- Soft Spanish Bread
- Brown Pandesal
- Small-batch Soft Cinnamon Rolls
- Cheese Bread Rolls

Baked Pork Buns
Equipment
- Small Rolling Pin
Ingredients
- 2 ¼ tsp yeast mixed with 1 teaspoon sugar
- ½ cup lukewarm water (temp 40c/105f)
- 2 cups bread flour
- 2 cup all-purpose flour (add more if needed)
- ½ cup sugar
- 1 teaspoon salt
- ¾ cup fresh milk (lukewarm)
- 3 large egg yolks
- ½ cup unsalted butter (softened)
- oil for the bowl
- 600 grams sweet pork filling (recipe is here)
Topping (option 1)
- ¼ cup plain breadcrumbs (for asado roll)
Topping (option 2)
- 1 egg + 1 tbsp of milk (for Asian-style bun)
- toasted sesame seeds (optional)
Instructions
Make the Pork Filling
- Make the filling using my easy pork bun filling recipe.
- Once the pork is cooked, let it cool. Transfer to an airtight container then put in the fridge to set for 6 to 24 hours. This will make the mixture compact and easier to fill into the dough.
Make the Dough
- In a medium-size bowl, combine lukewarm water, 1 teaspoon of sugar, and yeast. Stir until completely dissolved. Let it stand for 5 to 10mins until yeast begins to foam.
- Meanwhile, in the bowl of your stand mixer, combine flour, sugar, and salt. Mix thoroughly.
- Add milk, yeast mixture, egg yolks, and butter to the dry ingredients. Stir with a spatula until just combined. Attach the dough hook and turn the stand mixer on to the lowest speed and mix until flour is incorporated, scraping down the sides of the bowl as necessary.
- Increase the speed to medium and beat for 2 minutes. Add additional flour as necessary, start with 1 tablespoons and go from there. Continue beating for 5 to 6 minutes until the dough is SLIGHTLY STICKY, elastic, and pulling away from the edge of the bowl. Be careful not to add too much flour.
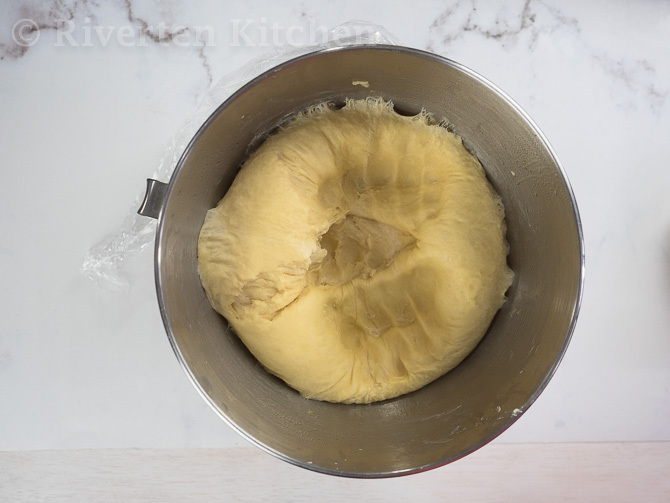
Rise # 1 Warm rise or cold rise
- Wipe or spray oil on the sides of the bowl then form dough into a ball. Cover with plastic wrap and let it rise in a warm spot for 1 hour until it doubles in size. To make ahead, do a cold rise by placing the dough in the refrigerator. The dough will slowly double in size the next day.
Rise #2 Divide and fill the rolls
- Remove the plastic wrap and punch the dough down. Transfer onto a lightly floured surface. Divide the dough into 18 to 20 portions and shape into a smooth ball. Place on a tray and cover with a towel to prevent the dough from drying. For an evenly sized dough, use a kitchen scale. Mine was about 50g each. Adjust based on your preference.
- Using a small rolling pin, lightly flatten it into a disc making sure that the center is thicker than the edges. Roll around the edges so it’s thinner (NOT FLAT!) than the center.
- Place about a heaping tablespoon of filling in the center of the dough. Gather the edges and seal the bun tightly then roll on a surface to smoothen (see video).
Variation 1: Asado Bread Roll
- Lay it in the bread crumbs. Shake off excess then place seal side down in the baking tray greased or lined with a parchment paper. Make sure that the dough is arranged 2 inches apart. Cover with a towel or cloth and let it rise for 40mins to 1 hour.
Variation 2: Asian-style bun
- Place the dough in a baking tray, arranged 2 inches apart. Cover with a towel or cloth and let it rise for 40mins to 1 hour. Brush the dough with egg wash. Sprinkle with sesame seeds (if using).
Bake
- Preheat oven at 180c/350f, 15 minutes before the dough rolls finishes rising. Bake for 18 to 20 minutes until the top turns light brown.
Recipe Notes & Tips:
- Splitting the tasks into two or three parts is the key to making baked buns less tedious–e.g. day 1: make the filling and the dough. day 2: shape and fill the dough and bake. Note: A refrigerated dough (1st rise) is best to use within 48 hours.
- Bread flour – can be substituted with all-purpose flour if not available. Replaced in the same amount as mentioned in the recipe.
- Use a stand mixer with a dough hook to make the kneading process super easy.
- Check out my pandesal recipe which includes step-by-step pictures and a video guide that will walk you through the whole process of making and dividing the dough.
- Remember to lightly flatten, don’t press too hard otherwise the dough will be too thin.
- Don’t overfill! It will be hard to close the dough and filling might ooze out of the bread during baking.
- Storage/Shelf-life: You can store leftover buns in the fridge for 3 days in an air-tight container.
- Re-heat in a mini-oven toaster for 1 to 2 minutes over low heat or 30 seconds in a microwave.
- Variation: Brush the surface of the dough with egg wash instead of laying it on bread crumbs.